SatComm Installation Build Instructions
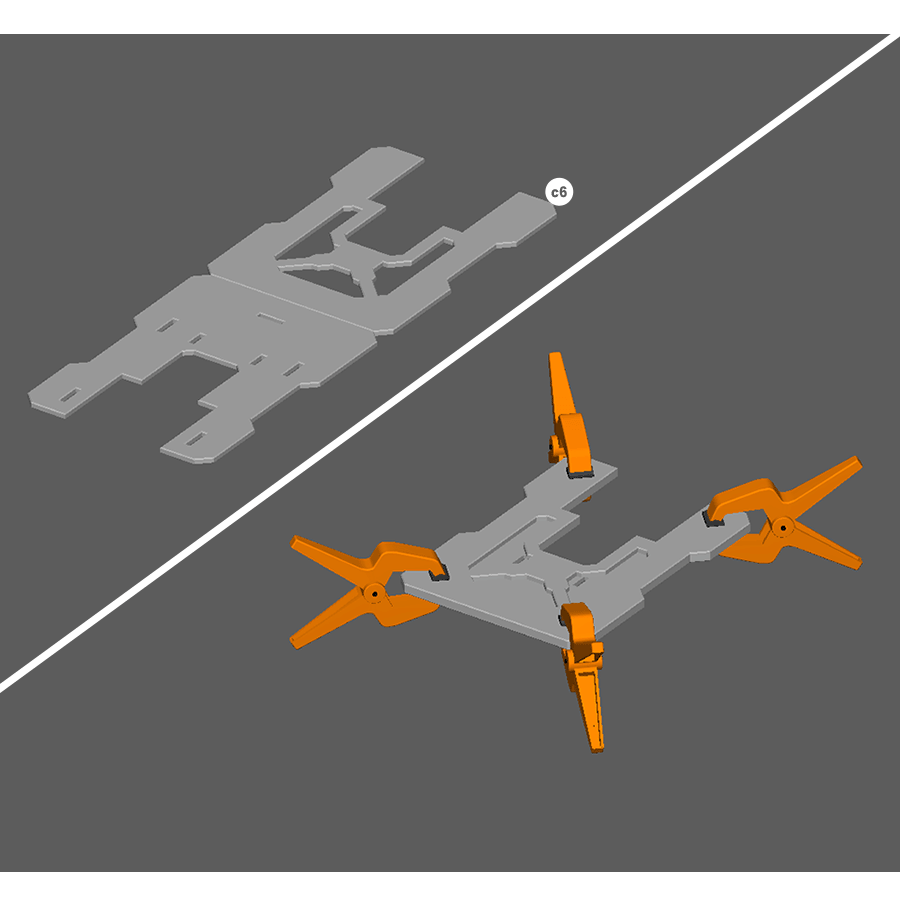
Step 1
- Fold, glue, and clamp as shown.
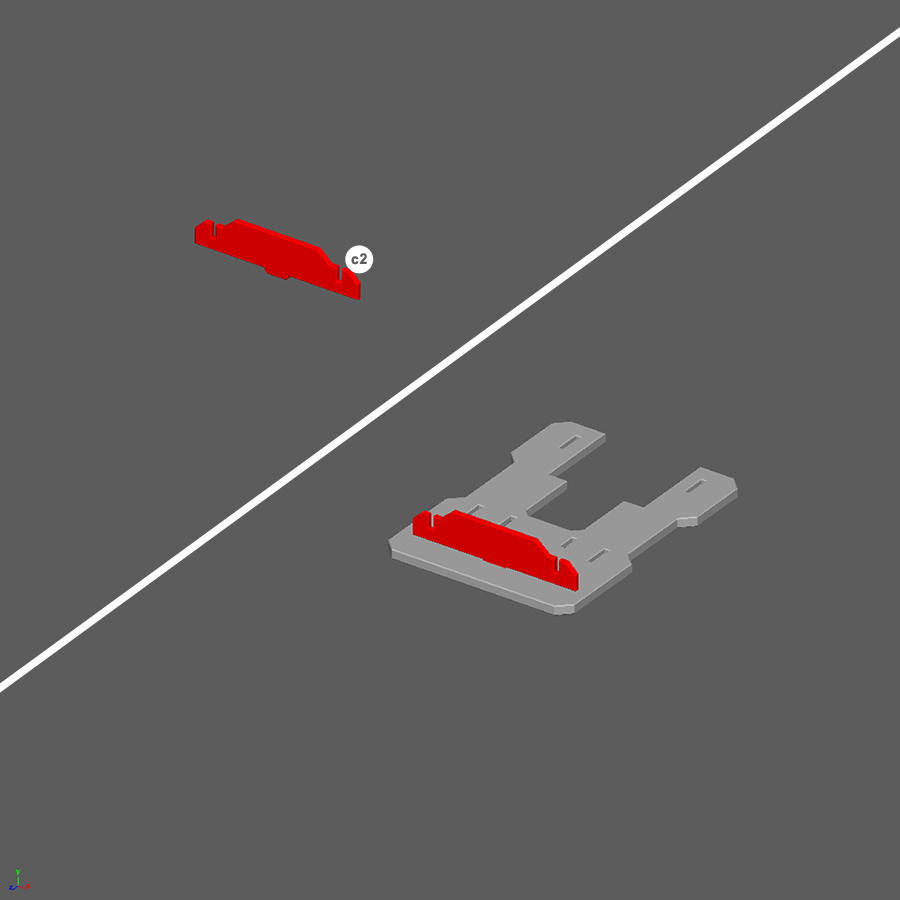
Step 2
- Flip piece c6 over.
- Glue as shown.
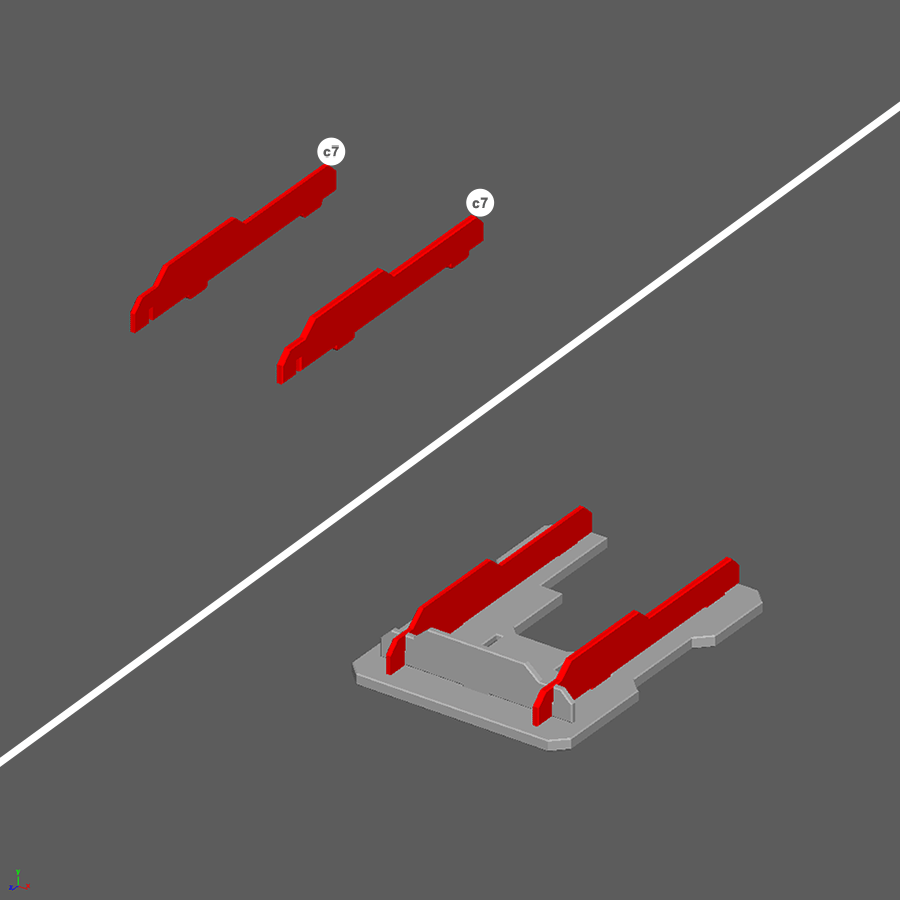
Step 3
- Glue as shown.
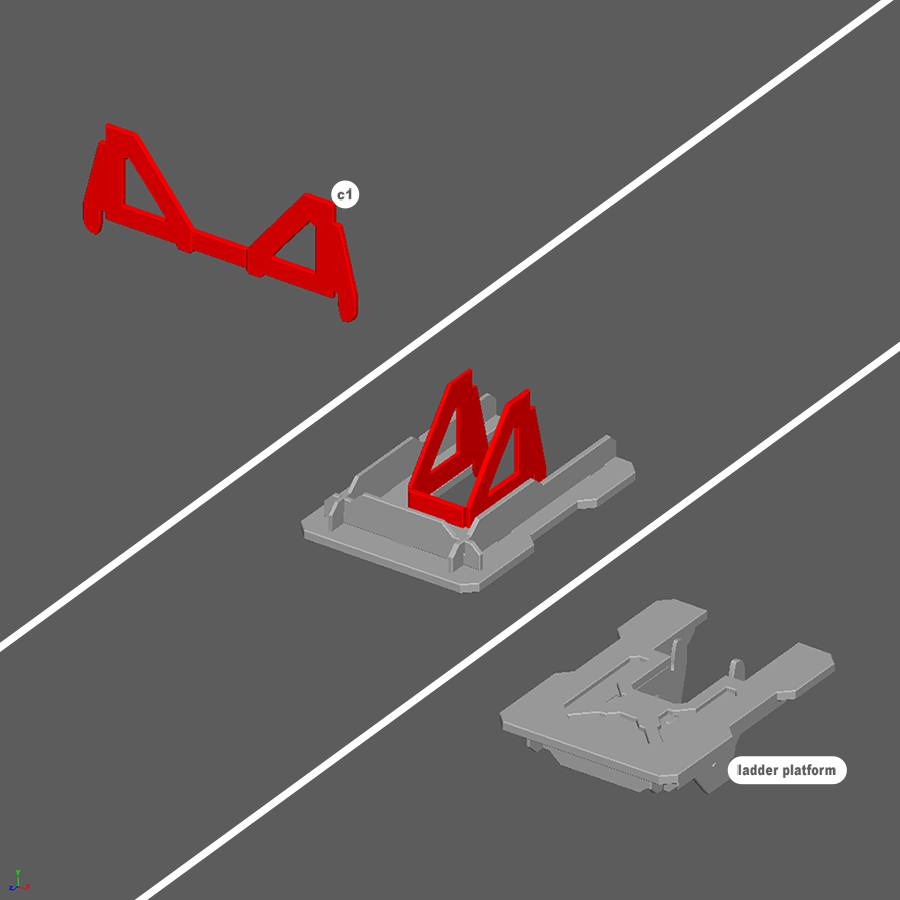
Step 4
- Fold along scores and glue as shown.
- Repeat steps 1-4 one more time.
You have now completed the ladder platforms.
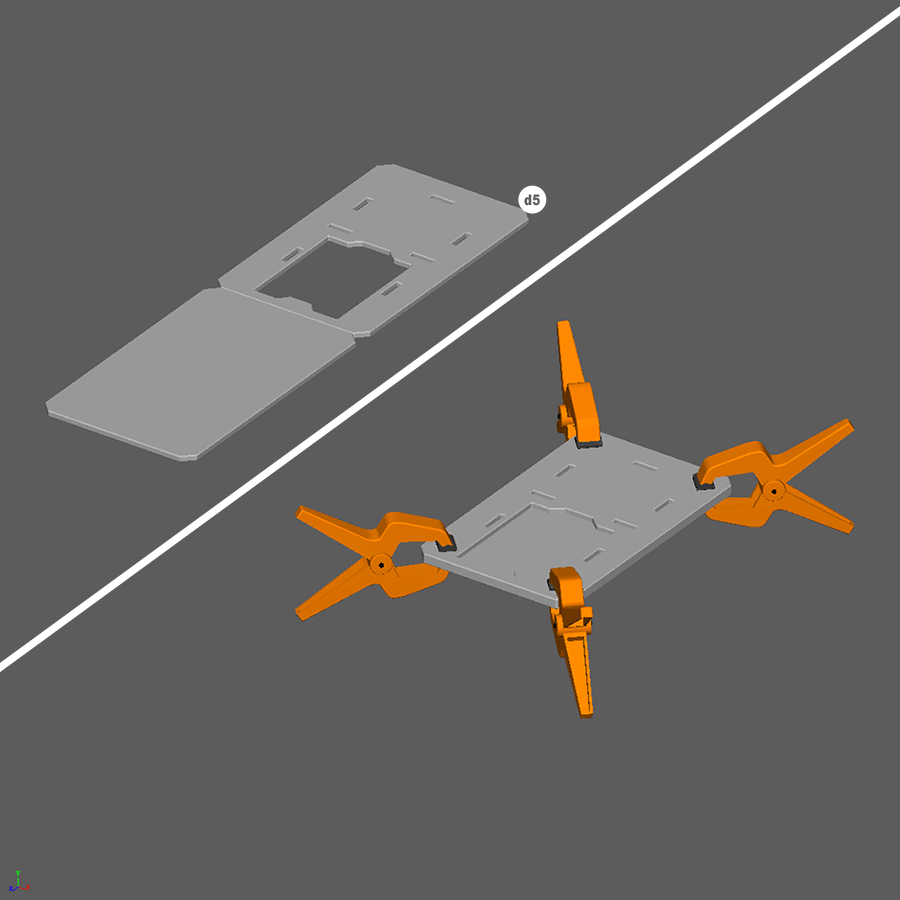
Step 5
- Fold, glue, and clamp as shown.
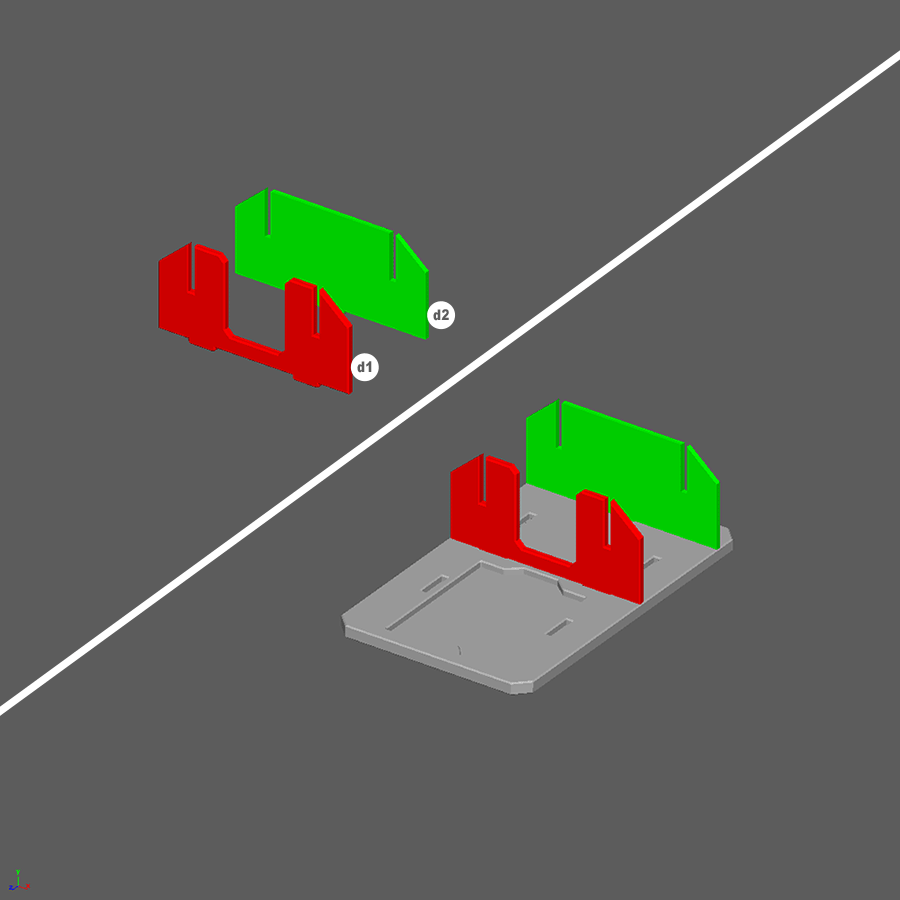
Step 6
- Glue as shown.
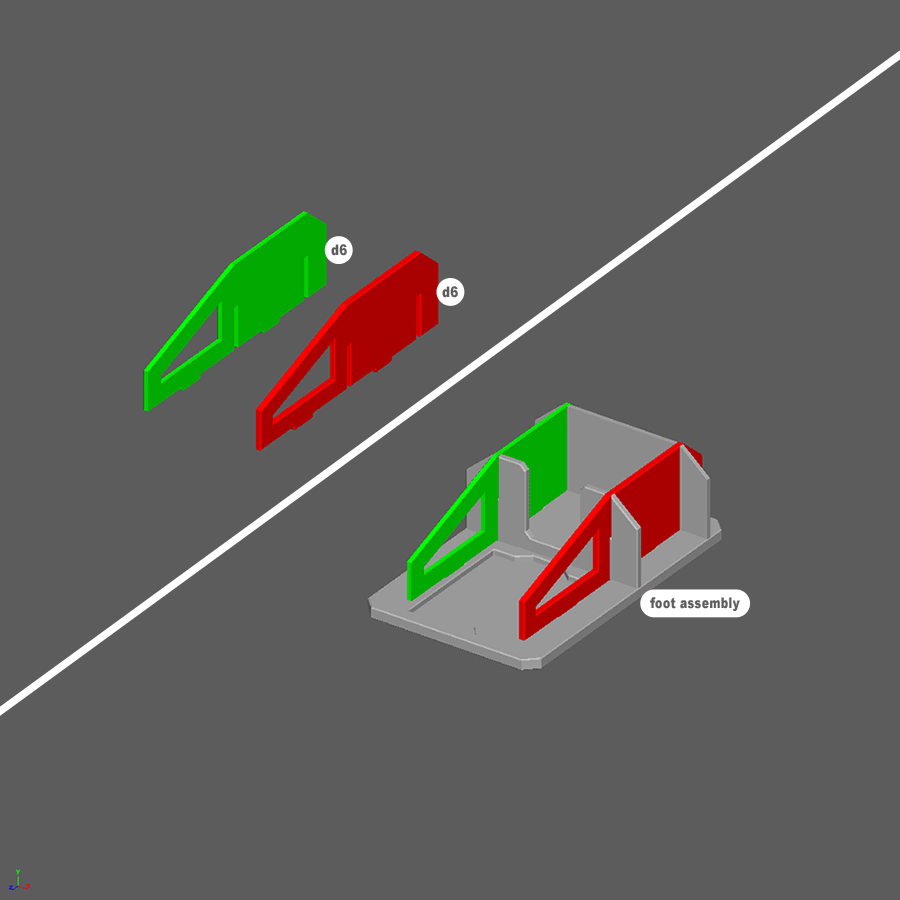
Step 7
- Glue as shown.
- Repeat steps 5-7 two more times.
These are the foot assemblies.
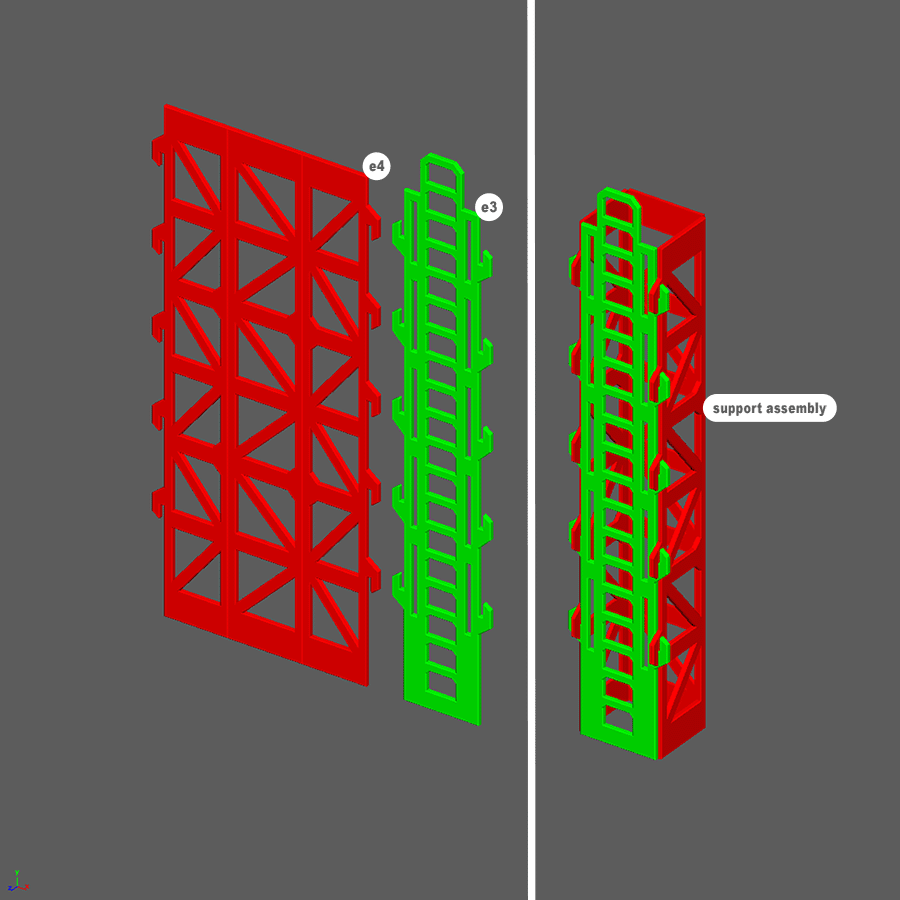
Step 8
- Fold as shown.
- Put glue dots into slots where pieces connect.
- Connect as shown.
These are the support assemblies.
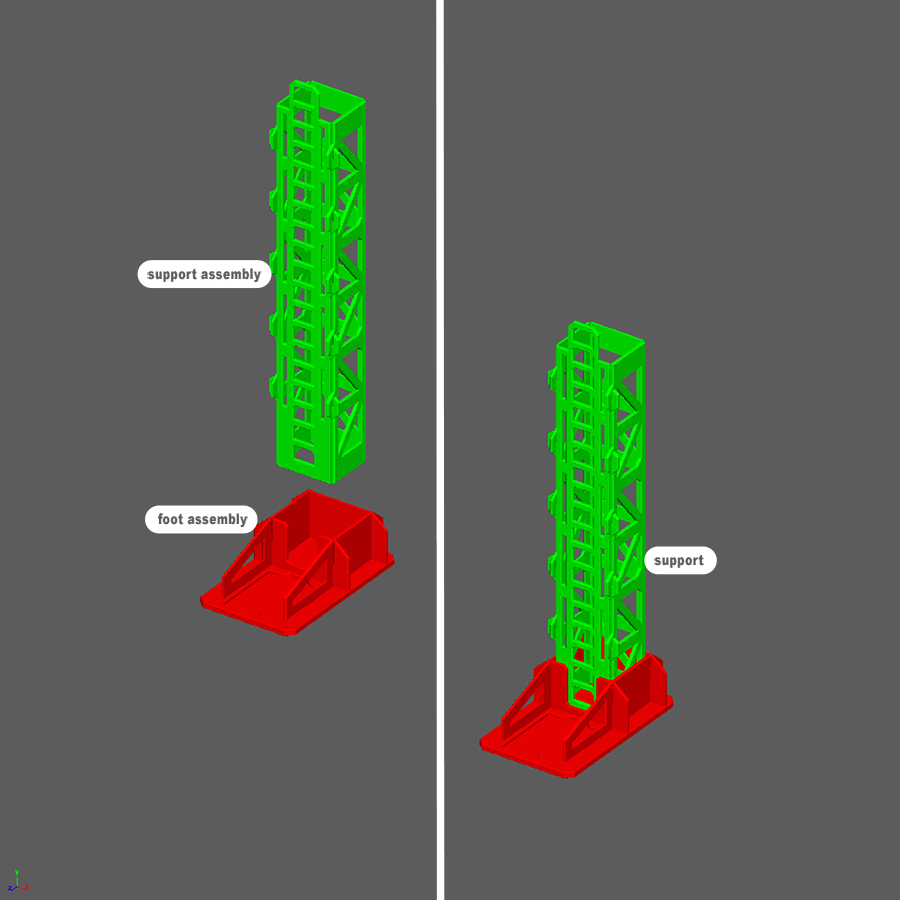
Step 9
- Glue support assembly into foot assembly as shown.
- Repeat steps 5-9 two more times.
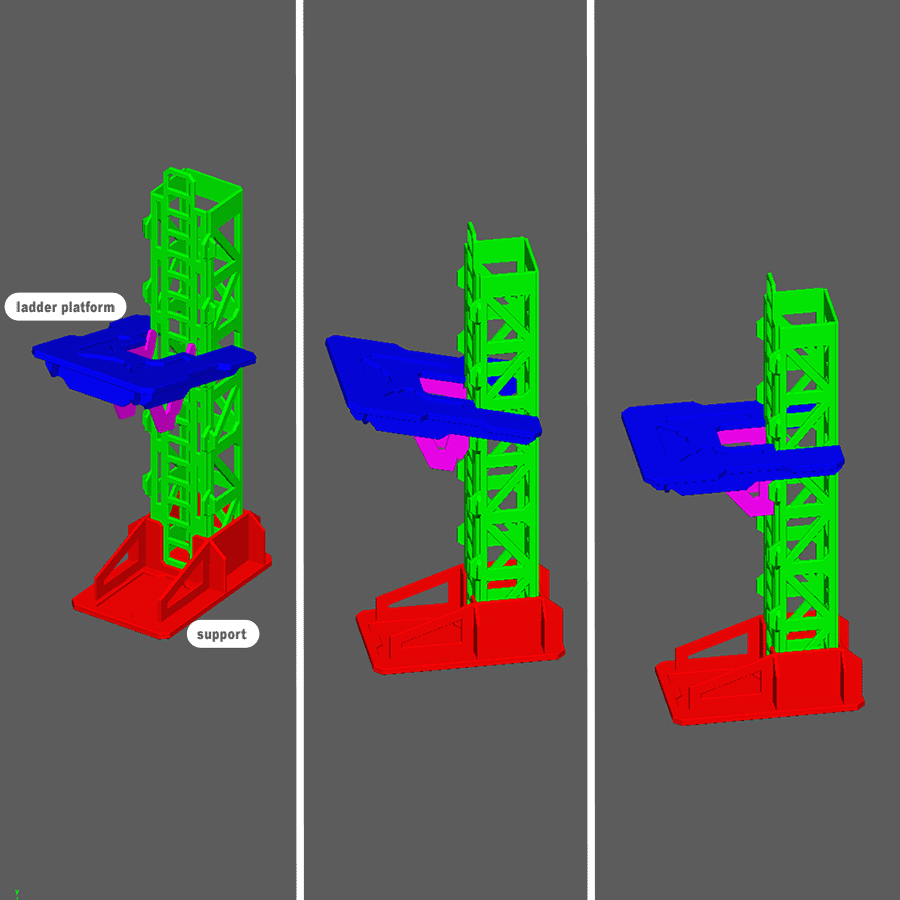
Step 10
- Ladder platform fits into ladder face of support as shown, with tabs colored as purple sliding into slots on ladder face.
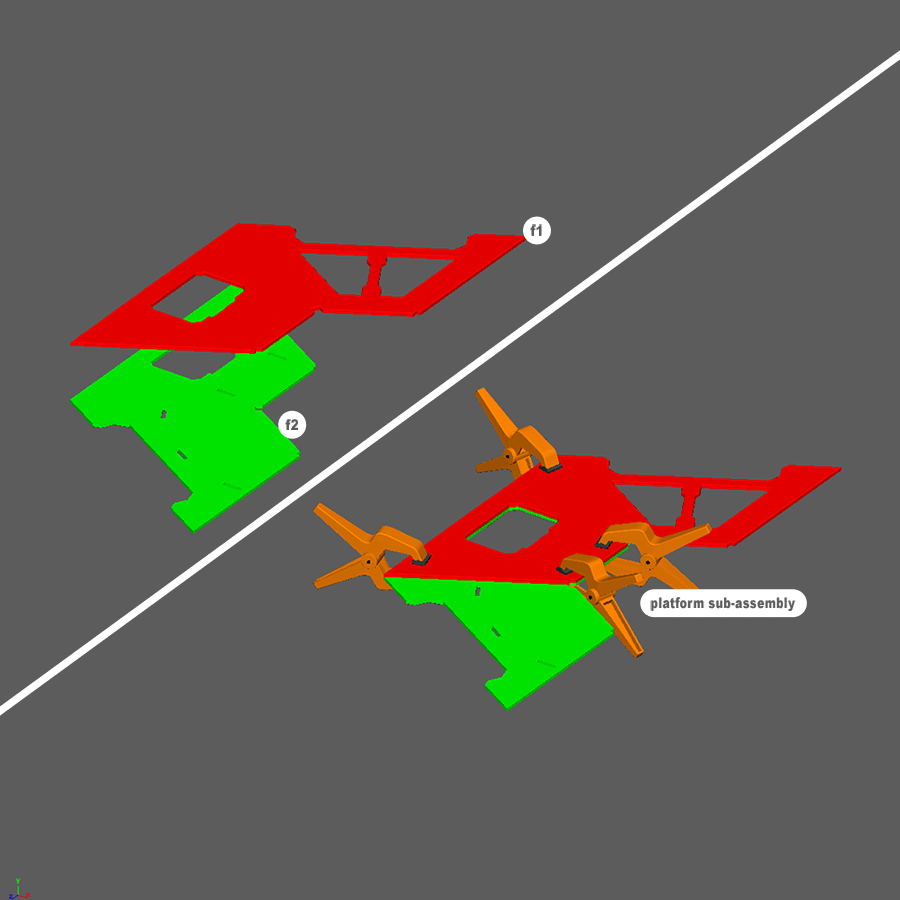
Step 11
- Glue and clamp the back side of piece f1 to the back side of piece f2 as shown.
- Repeat two more times.
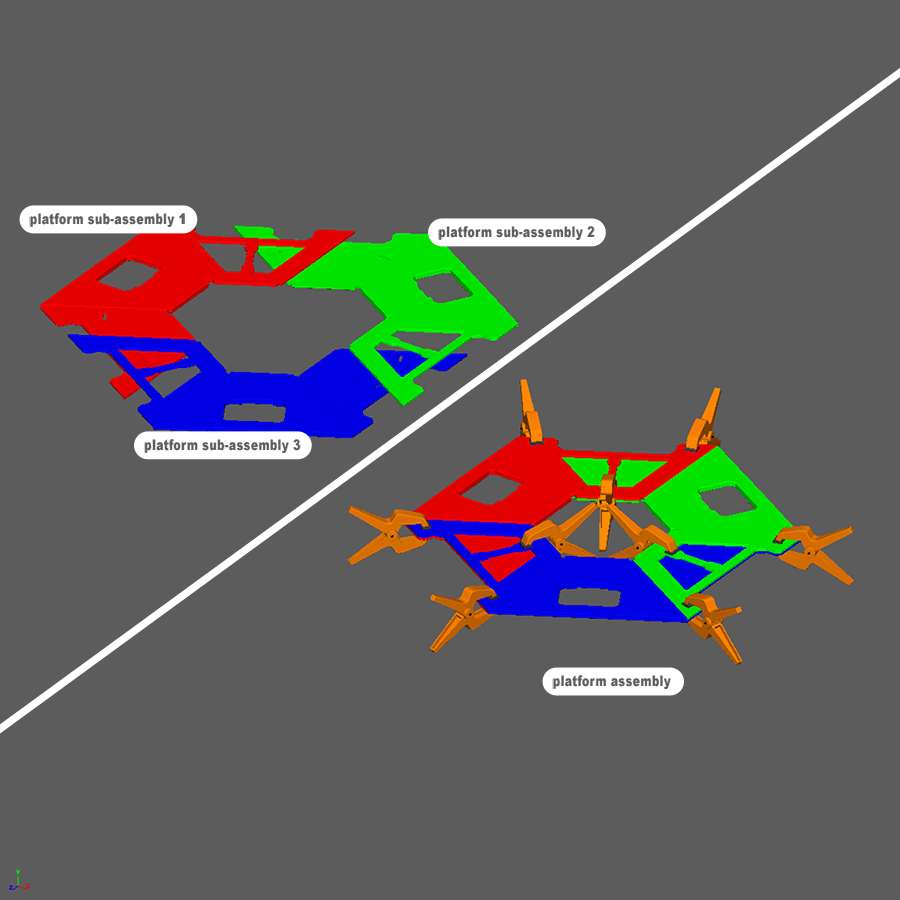
Step 12
- Glue all 3 platform sub-assemblies into 1 piece and clamp as shown.
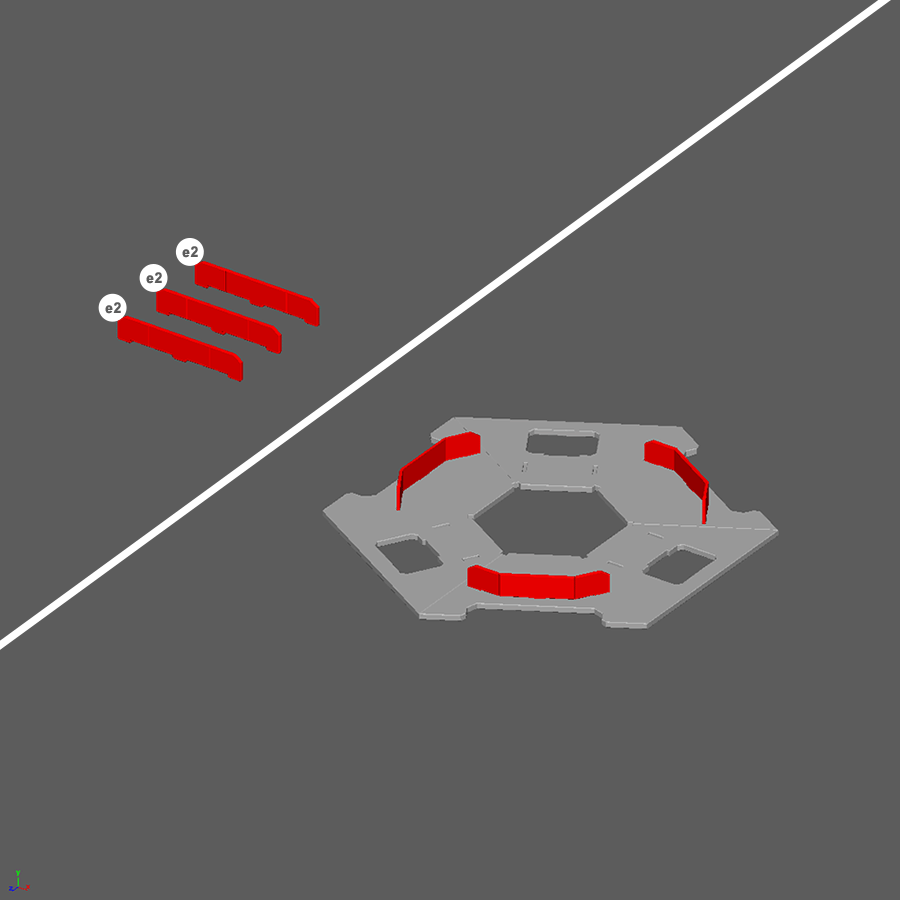
Step 13
- Fold and glue as shown.
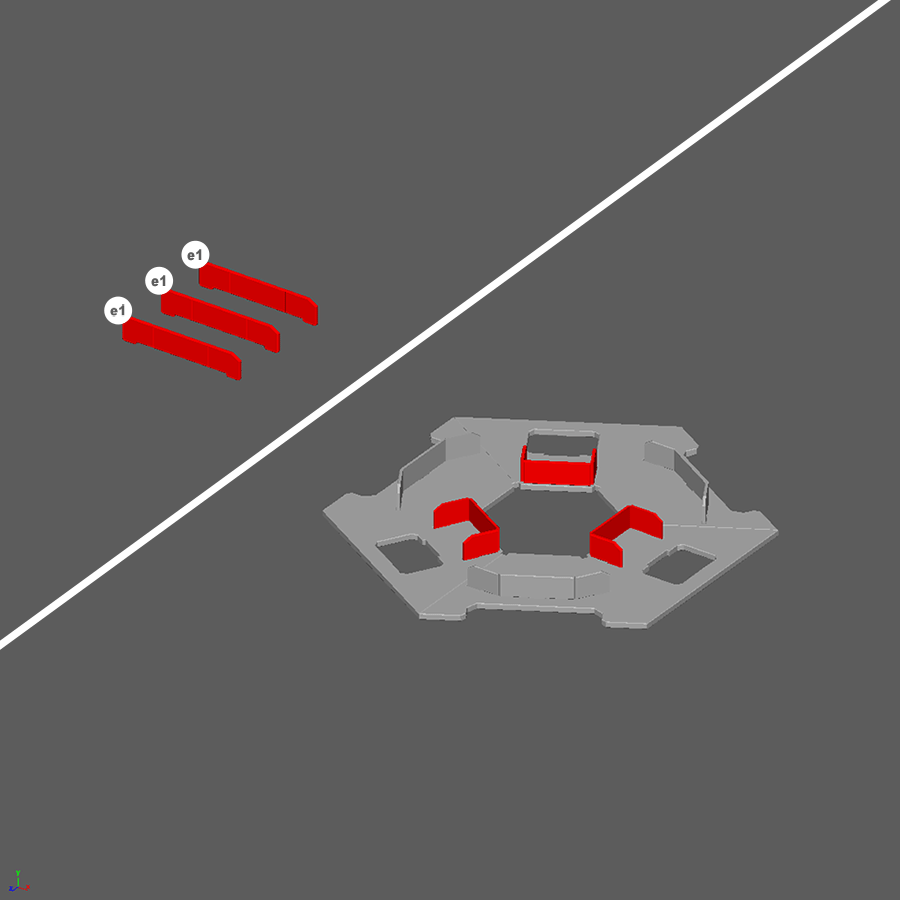
Step 14
- Fold and glue as shown.
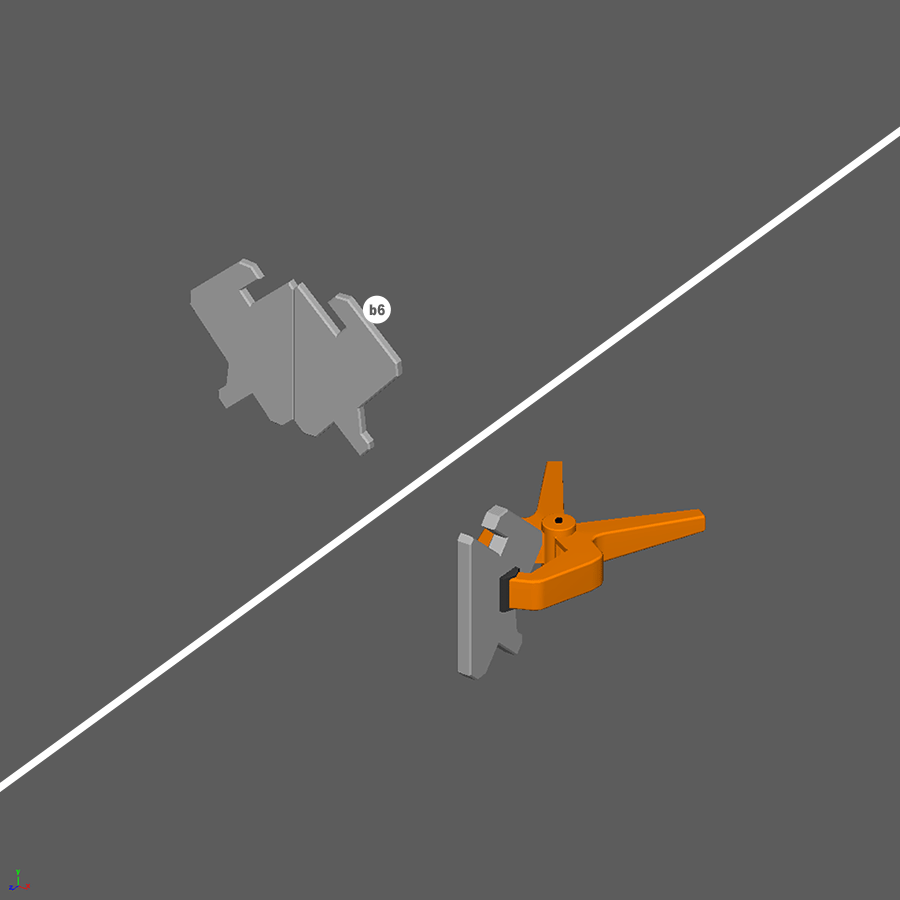
Step 15
- Fold, glue, and clamp as shown.
- Repeat five more times.
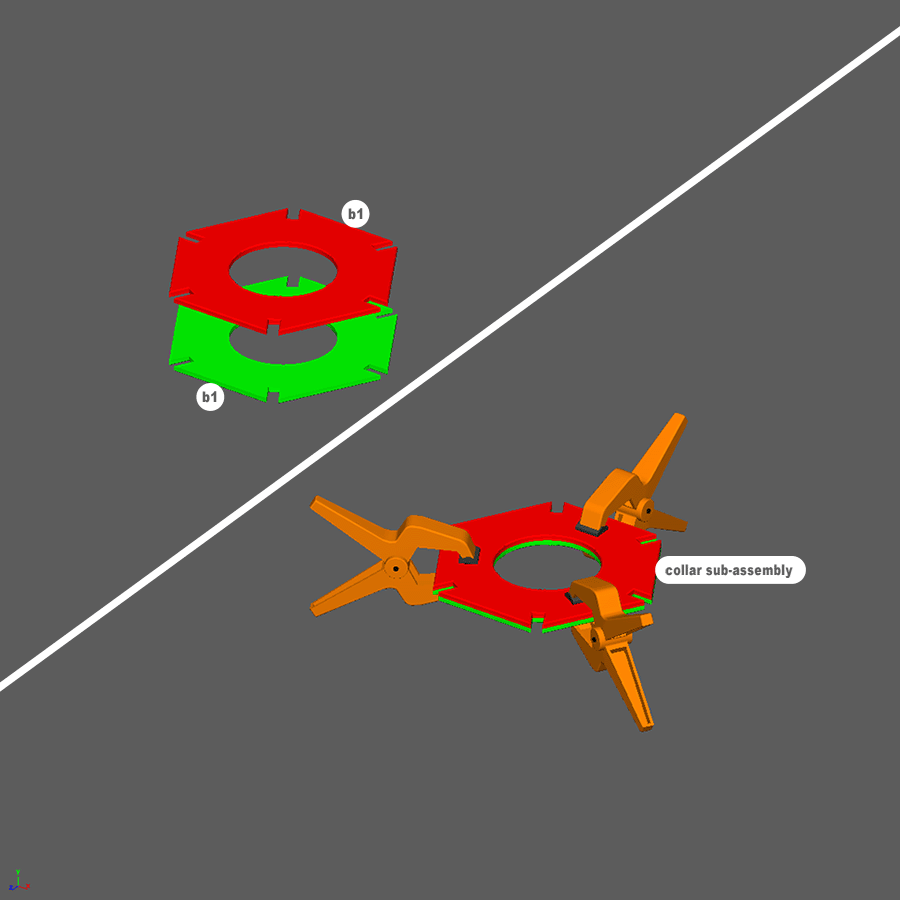
Step 16
- Glue and clamp as shown.
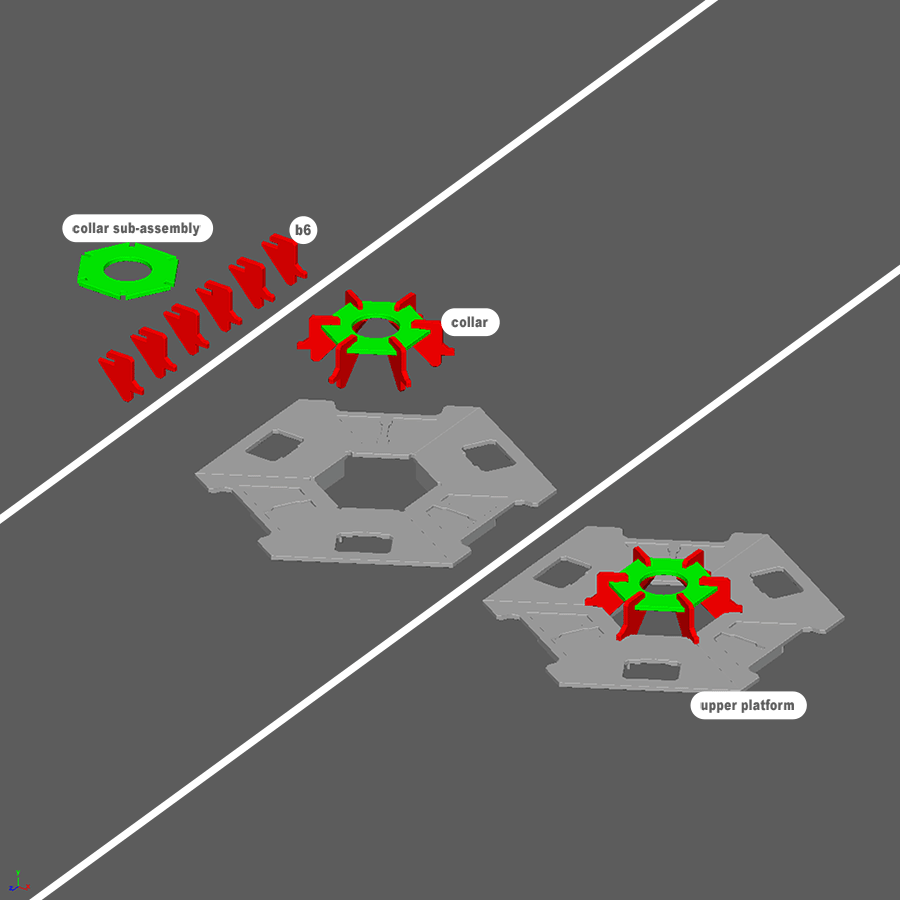
Step 17
- Glue as shown to make collar piece.
- Glue collar piece onto platform piece as shown.
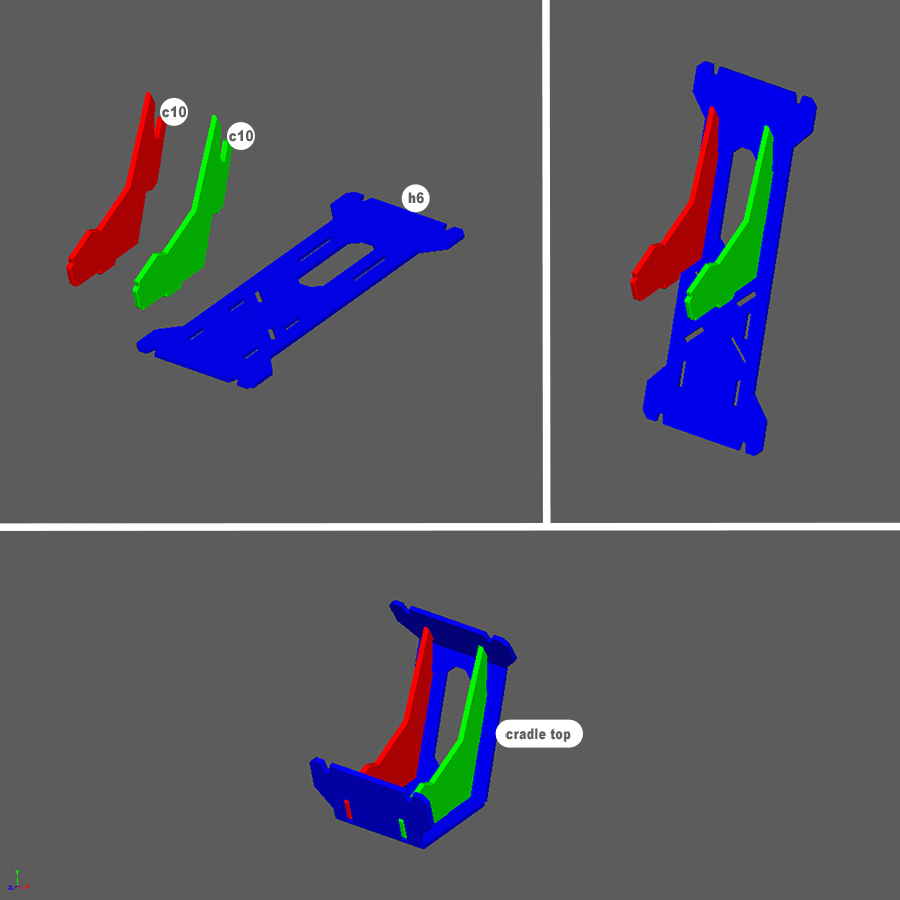
Step 18
- First glue pieces c10 into piece h6 as shown.
- Then fold piece h6 and glue other tabs into slots as shown.
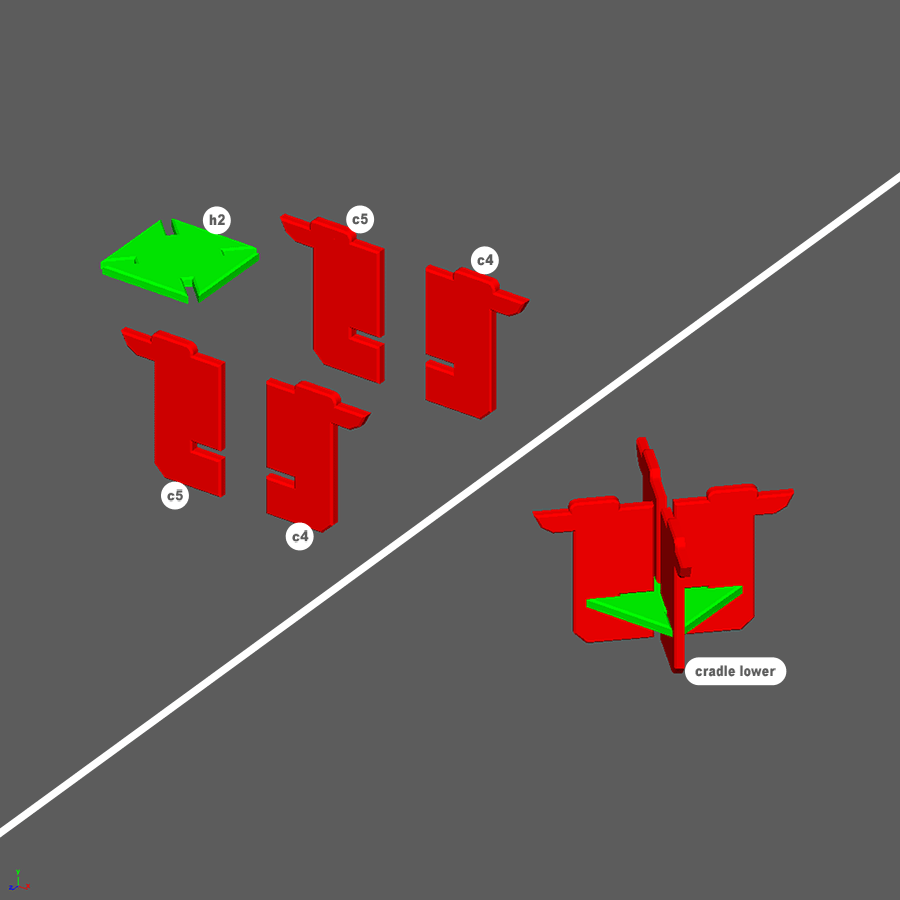
Step 19
- Glue as shown.
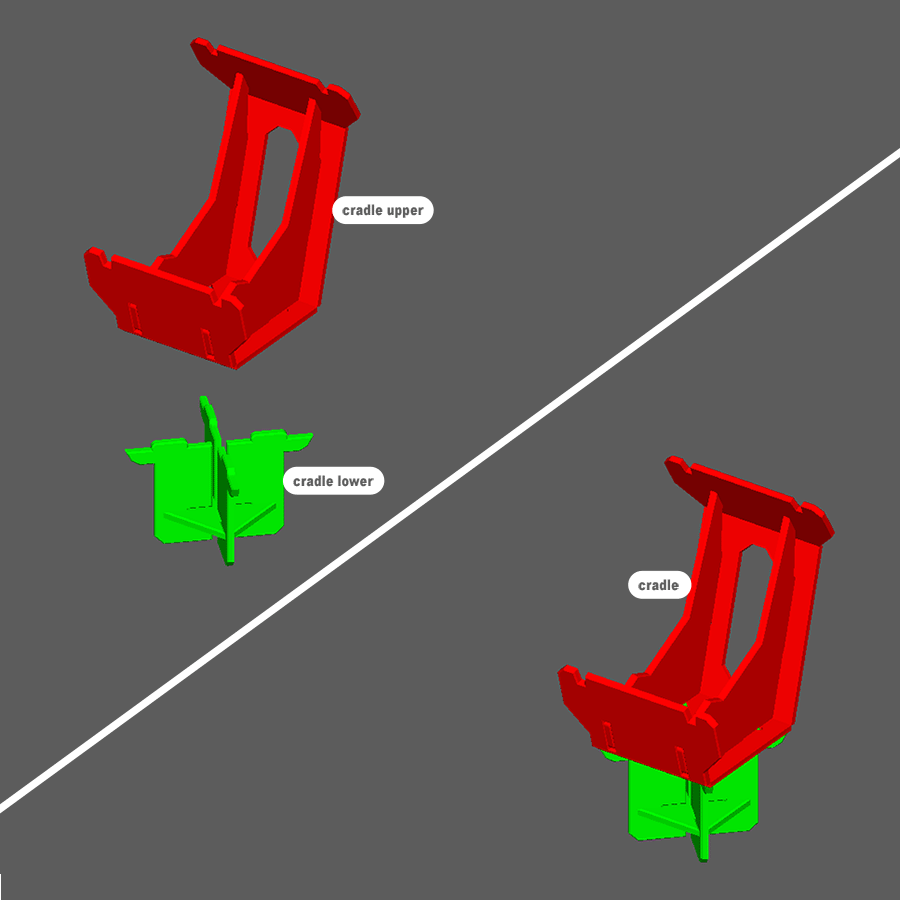
Step 20
- Glue as shown.
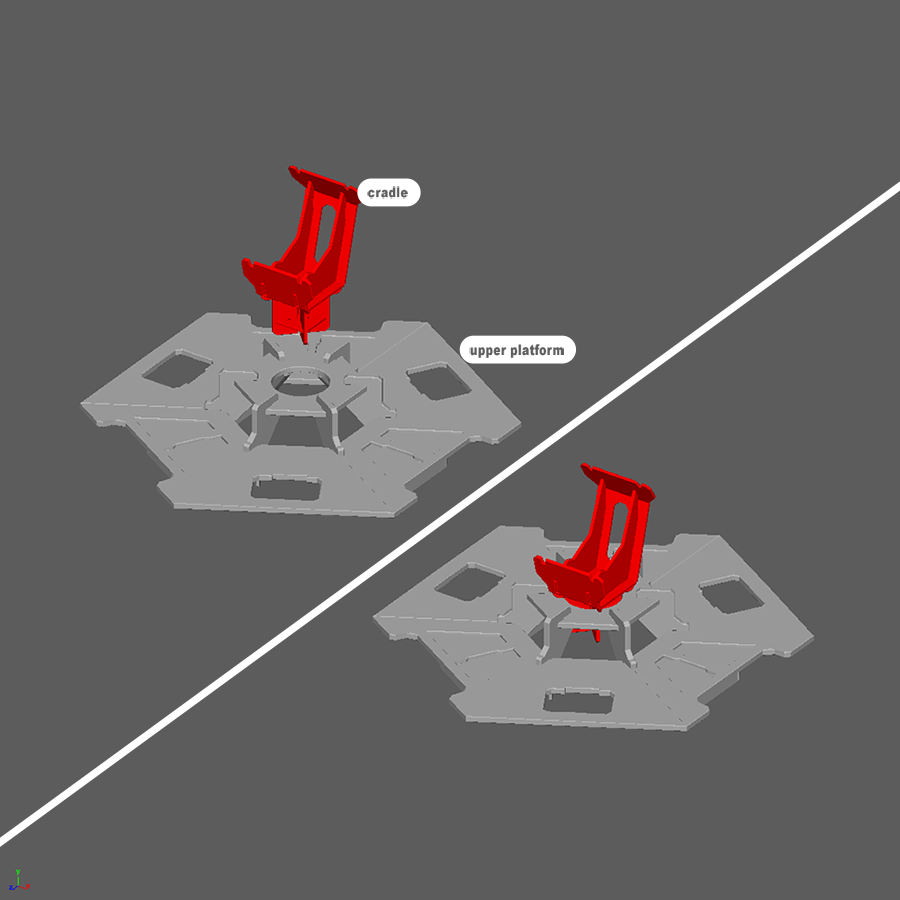
Step 21
NOTE: Do not glue the cradle into the upper platform, it is meant to spin in place.
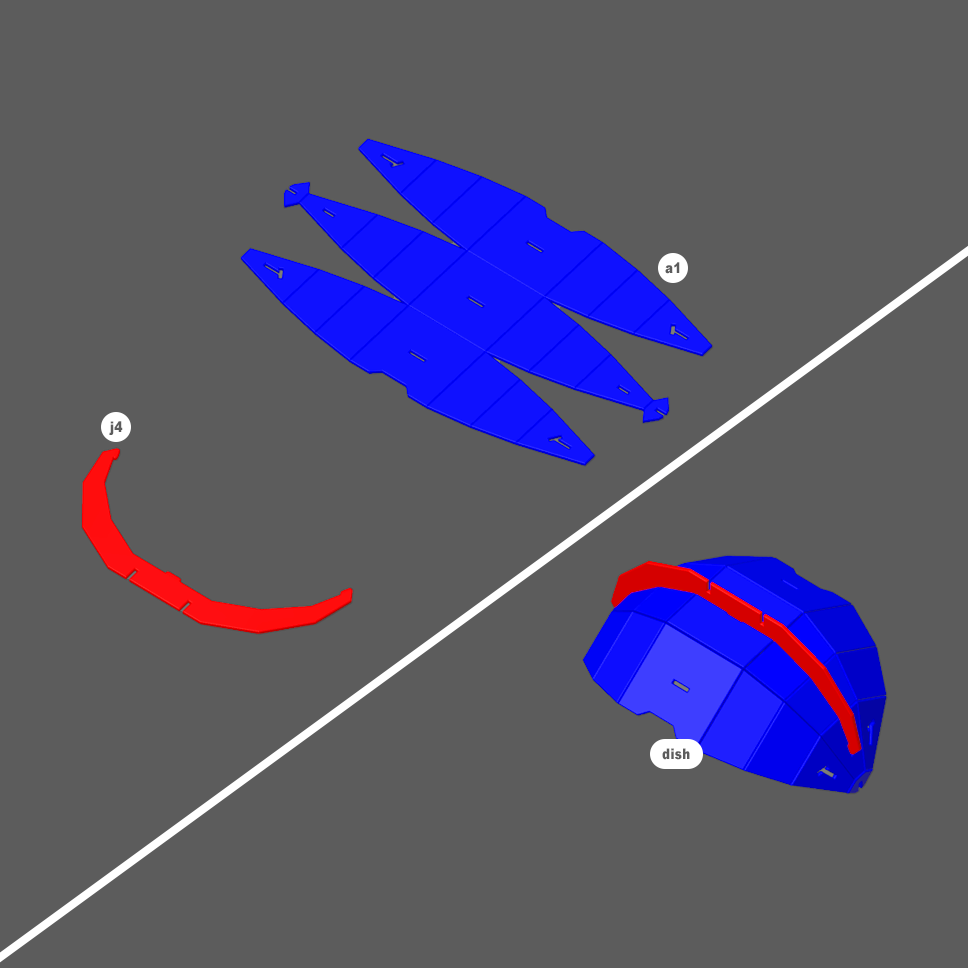
Step 22
- Fold all scores on piece a1 so it forms the dish.
- Glue center piece j4 to dish as shown.
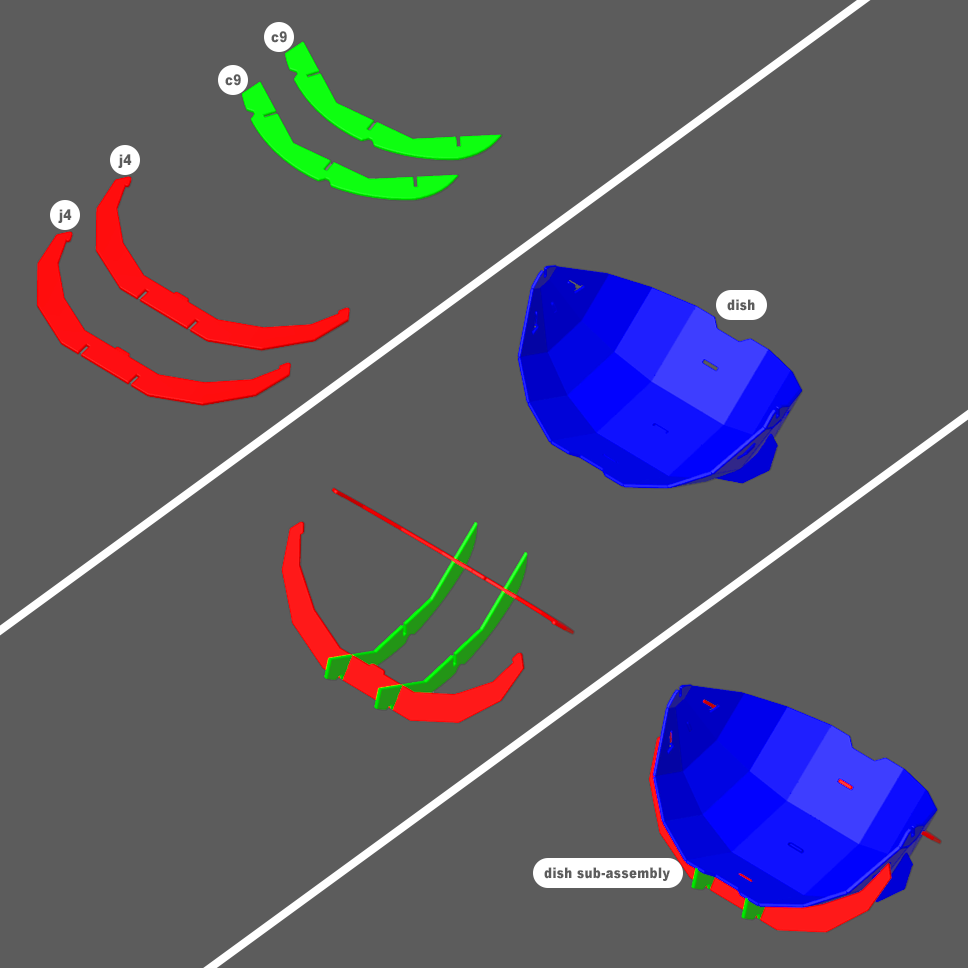
Step 23
- Glue pieces c9 and j4 as shown.
- Glue dish into assembled structure as shown.
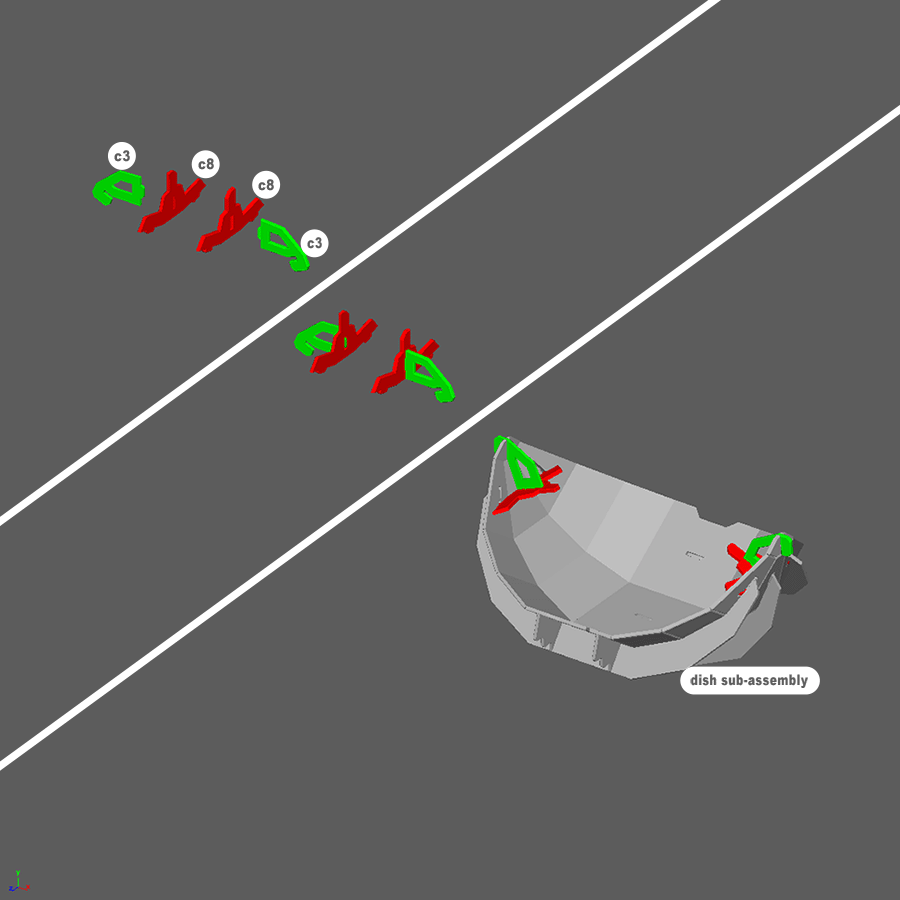
Step 24
- Assemble and glue as shown.
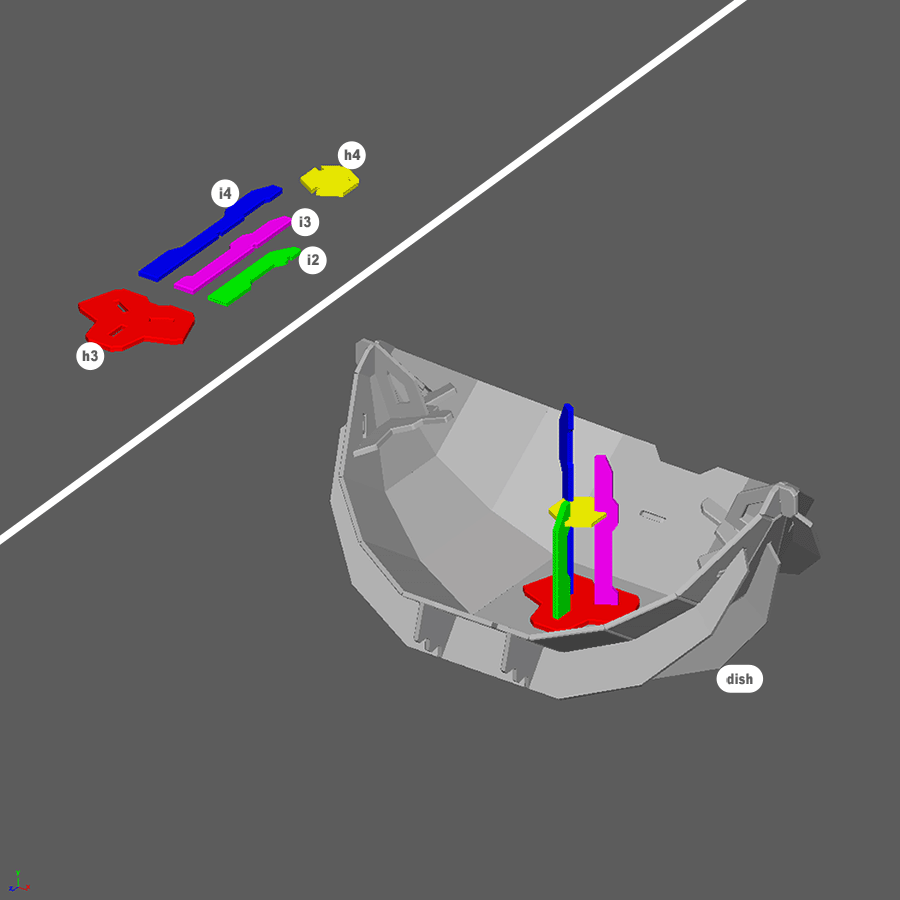
Step 25
- Assemble and glue as shown.
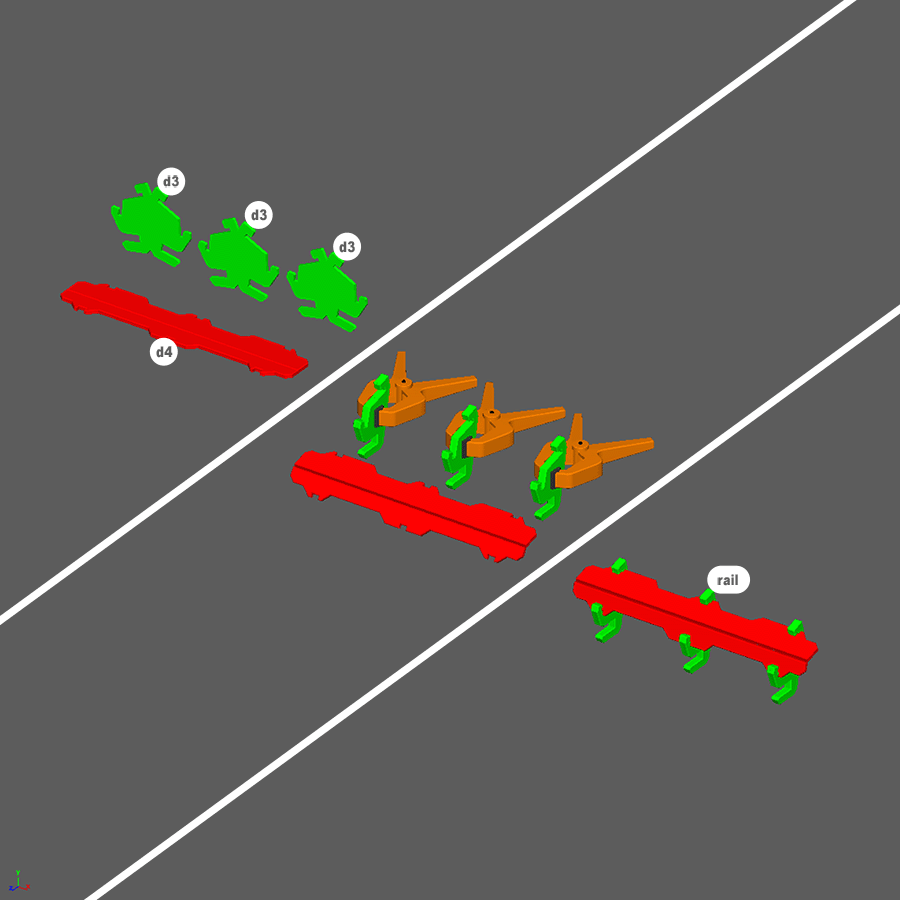
Step 26
- Fold, glue, and clamp pieces d3 as shown.
- Glue pieces d3 onto folded rail as shown.
- Repeat two more times.
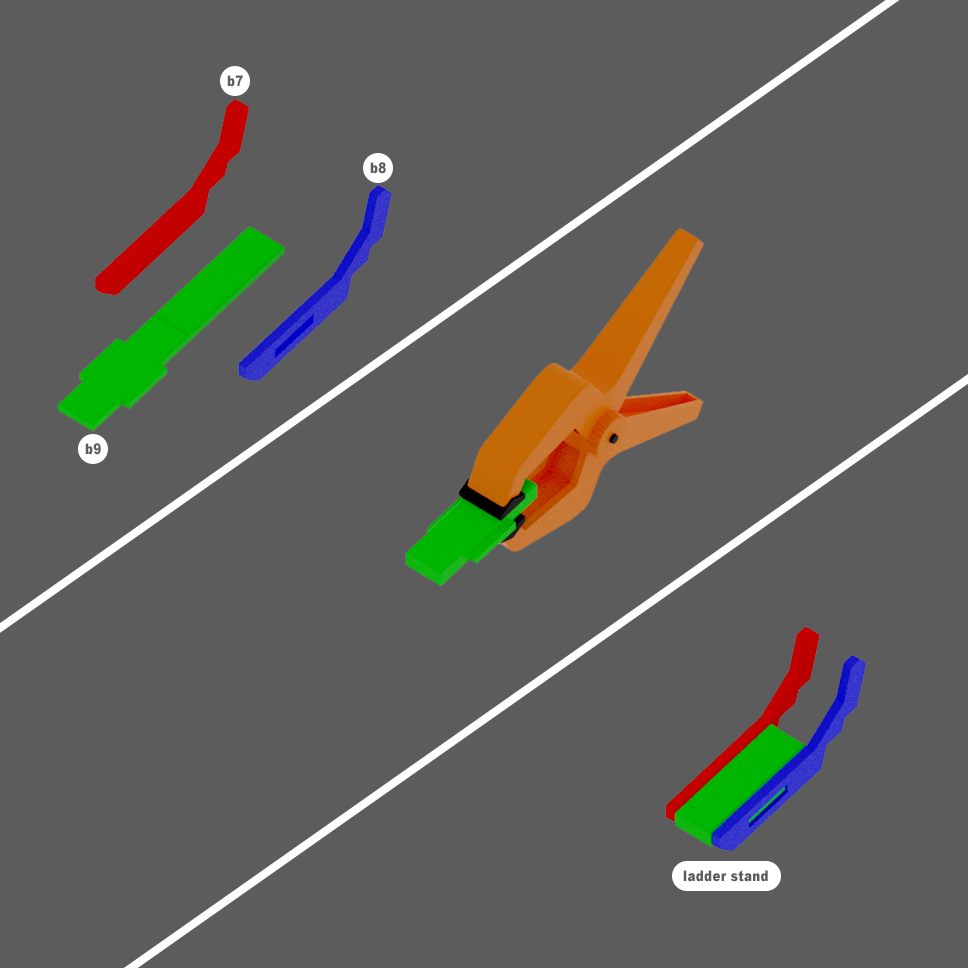
Step 27
- Fold, glue, and clamp piece b9 as shown.
- Glue and attach pieces b7 and b8 to create a ladder stand.
Note: These are for miniatures to stand on. They have notches to adjust for ladder pitch and can be moved throughout play to give your game a more accurate line of sight when using ladders.
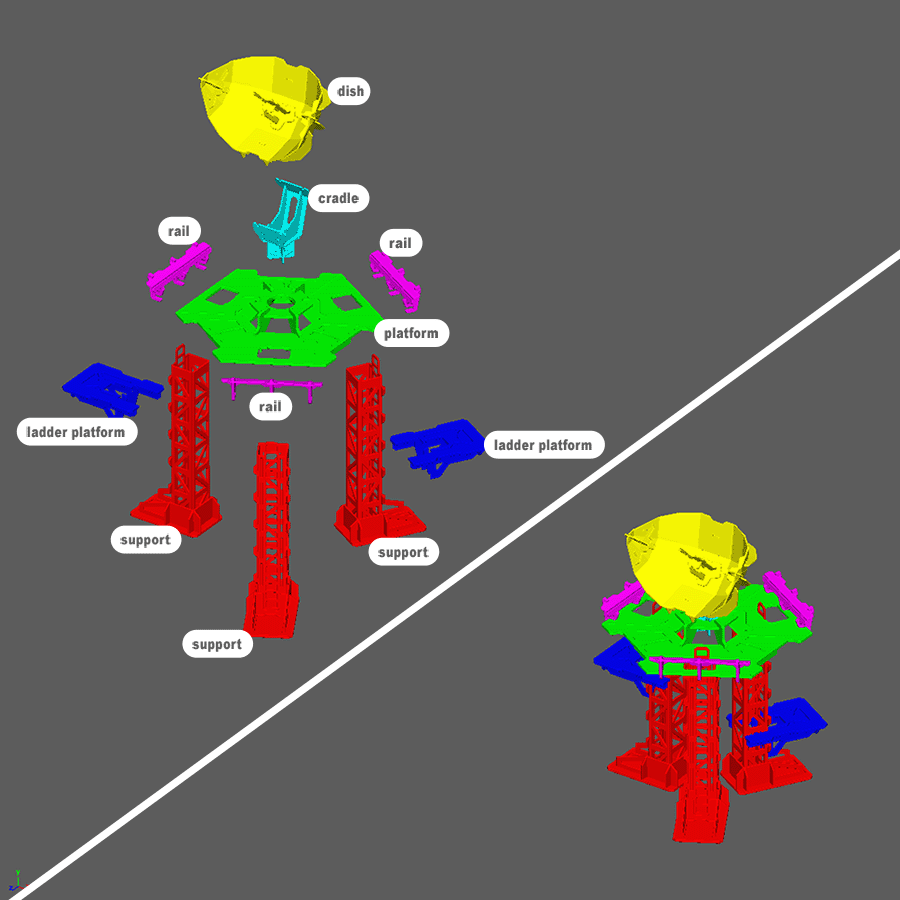
Step 28
NOTE: Do not glue these pieces together.
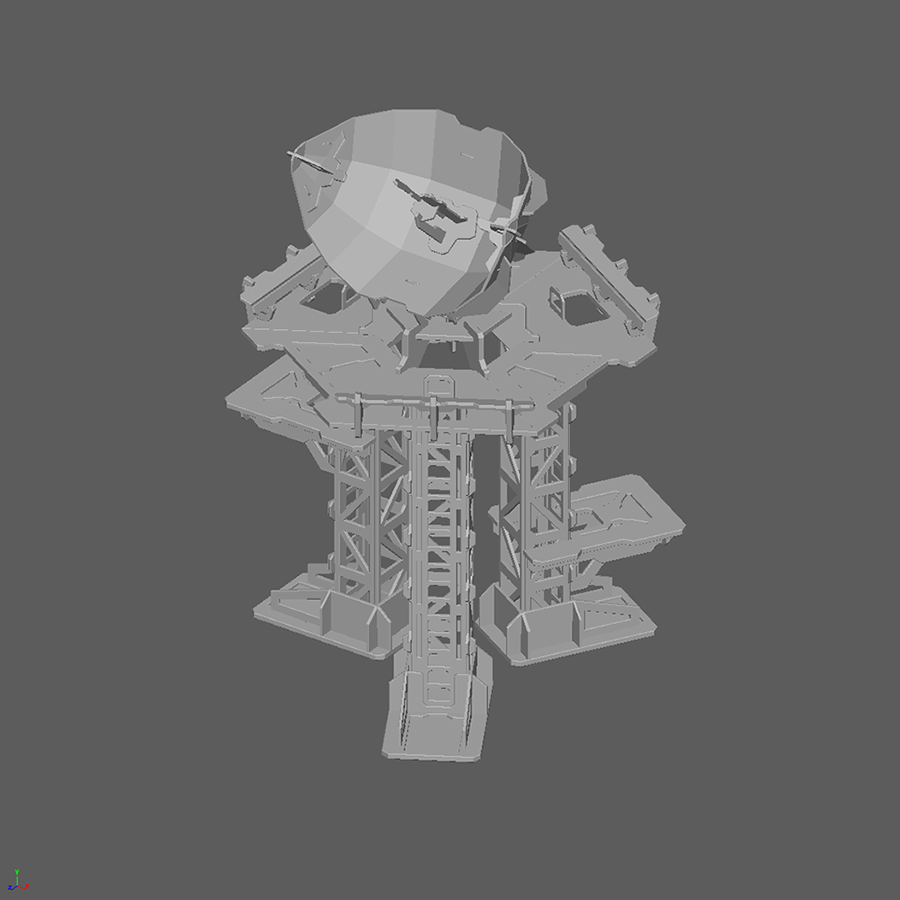
You’ve Finished The Comms Dish
Time to move on to the bunker!
The Comms Bunker
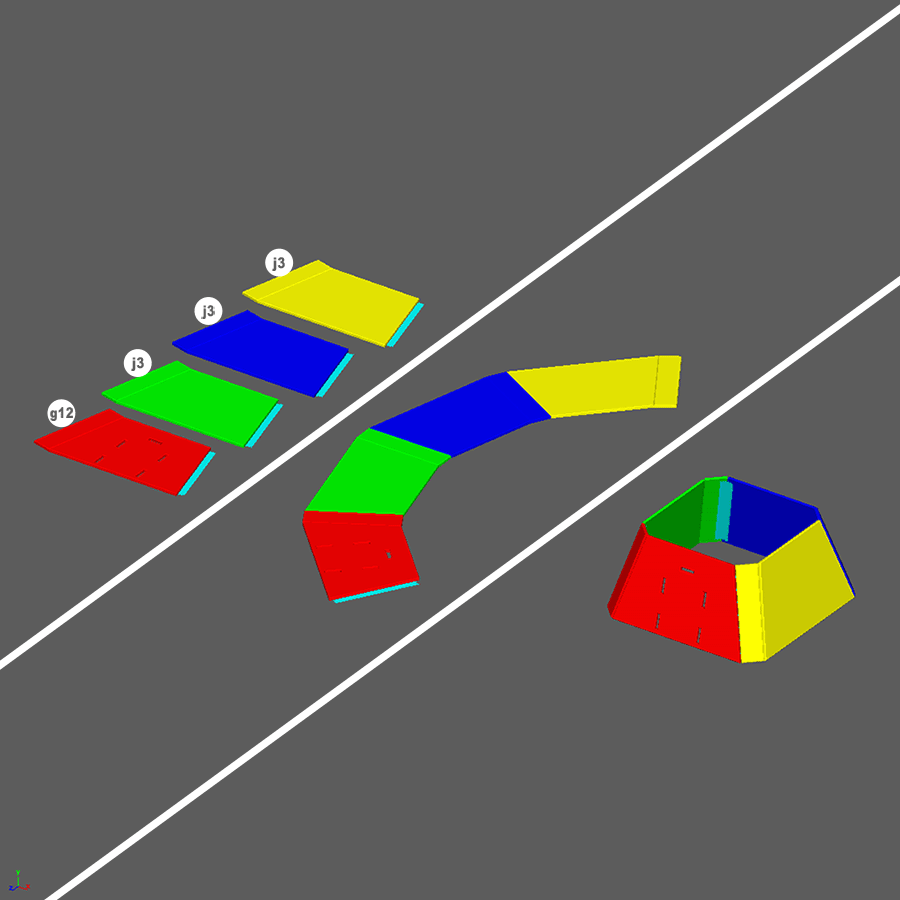
Step 1
- Put tape on backsides of pieces as shown with turquoise strips.
- Attach all 4 pieces together as shown.
Tape the ends together to make the structure shown.
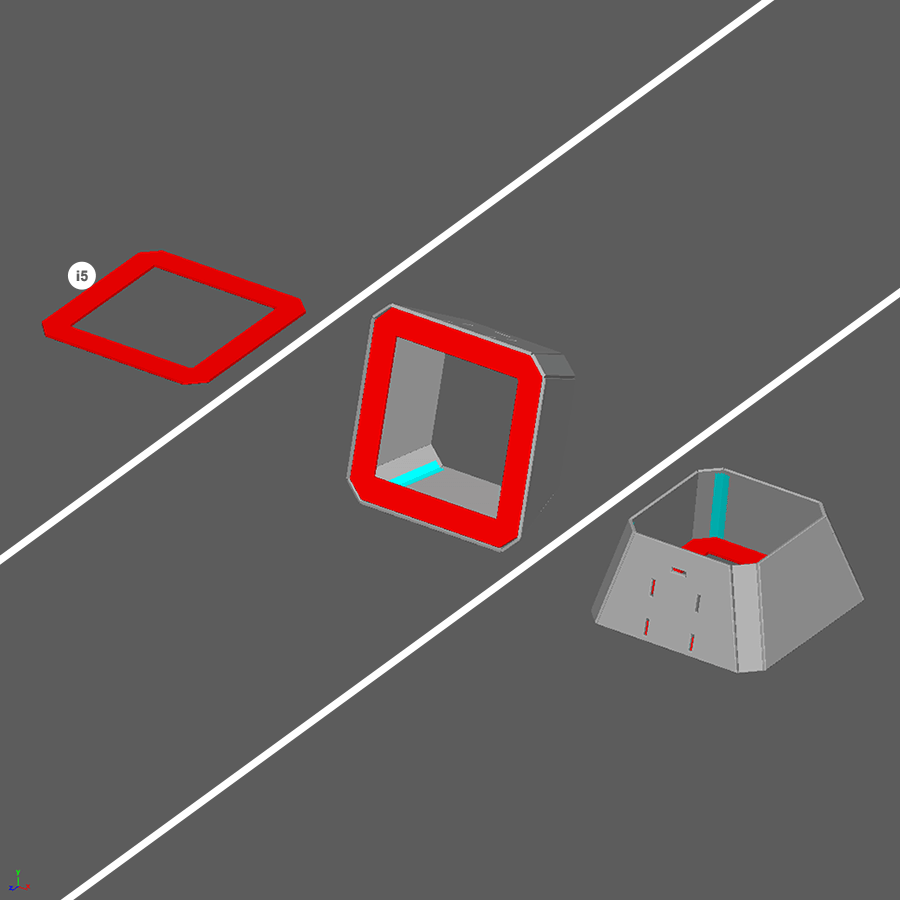
Step 2
- Liberally glue piece into base of structure as shown.
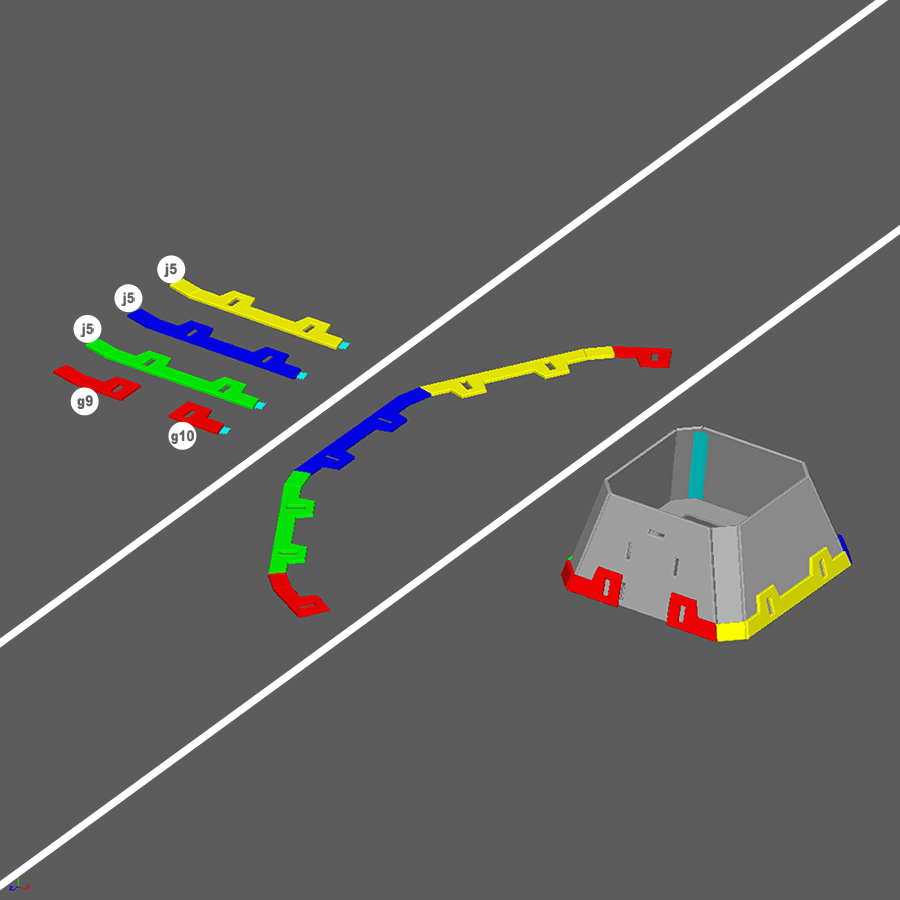
Step 3
- Put tape on backsides of pieces as shown with turquoise strips.
- Attach all 5 pieces together as shown.
- Wrap around base of structure as shown, making sure to leave g9 and g10 pieces on structure face with slots as shown.
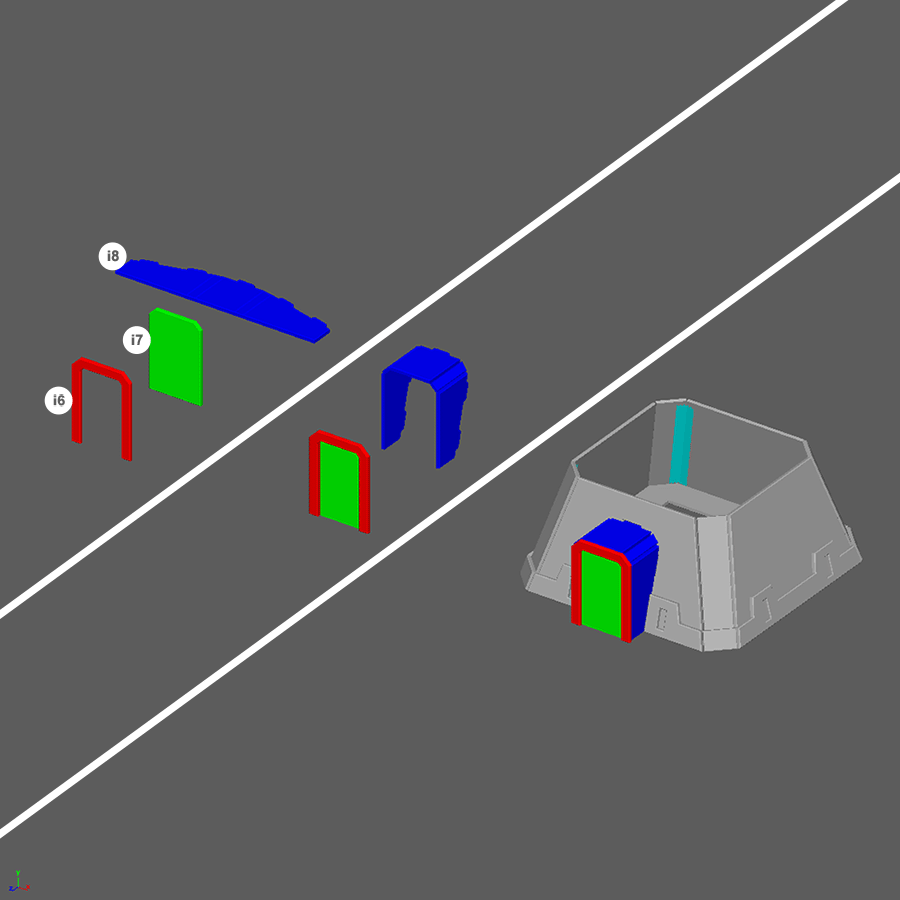
Step 4
- Fold piece i8 as shown.
- Glue pieces i6 and i7 together as shown.
- Glue pieces to front face of structure as shown.
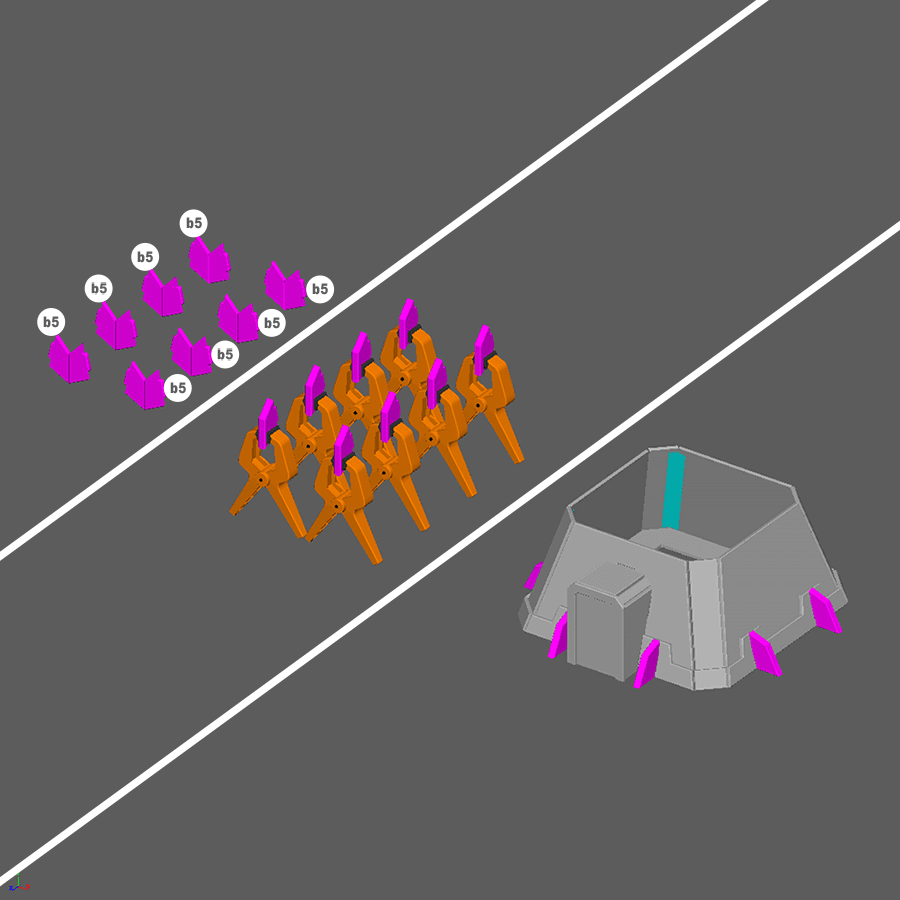
Step 5
- Fold, glue, and clamp as shown.
- Glue to structure as shown.
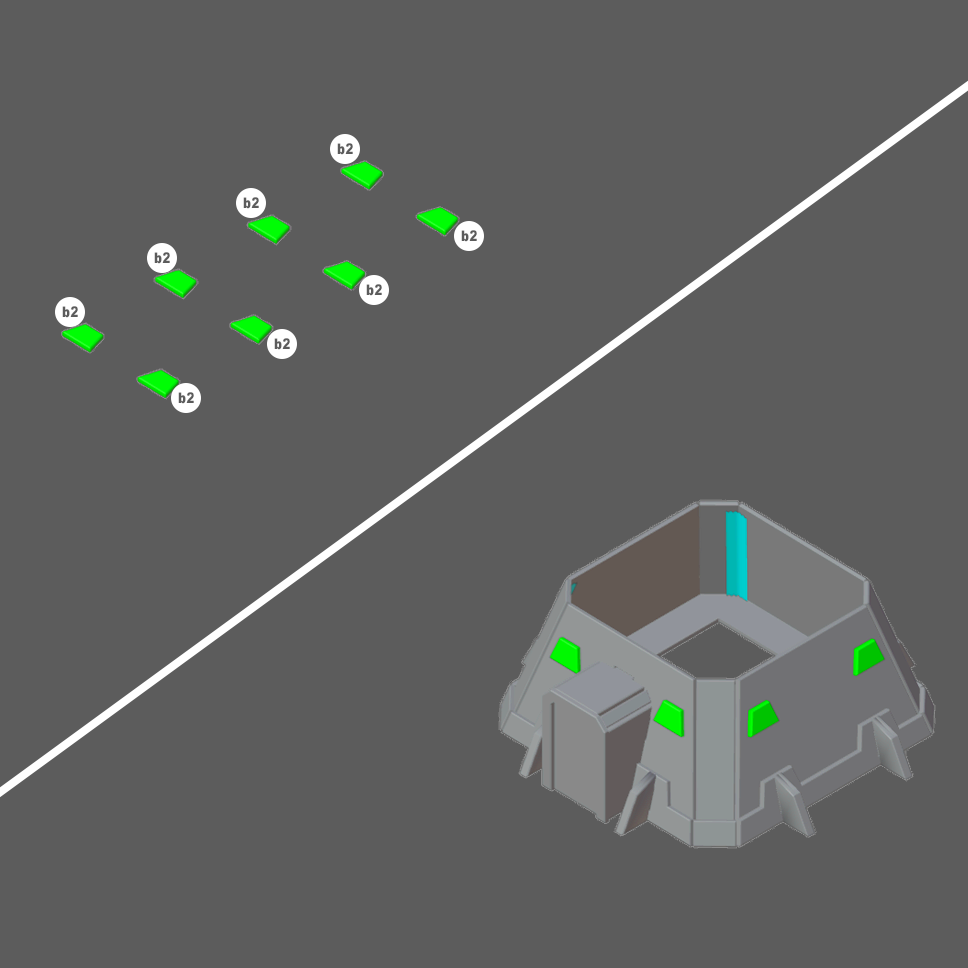
Step 6
- Glue all b2 pieces in place on the bunker bottom as shown.
Note: it’s important to get the b2 pieces glued with the short edge up and leveled as best as possible. Make sure to let them dry completely before moving onto step 7.
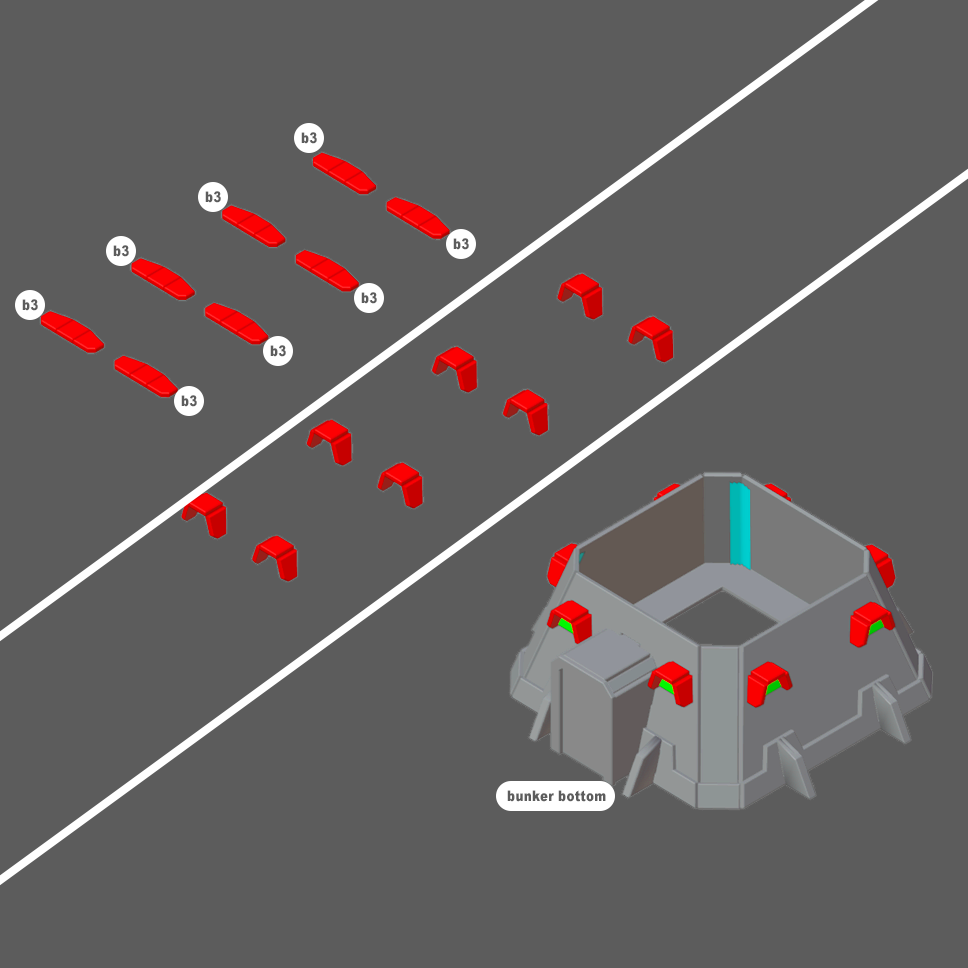
Step 7
- Fold pieces b3 as shown.
- Glue to structure over already adhered pieces b2 as shown.
Note: it’s important to get the b2 pieces glued with the short edge up and leveled as best as possible. Make sure to let them dry completely before moving onto step 2.
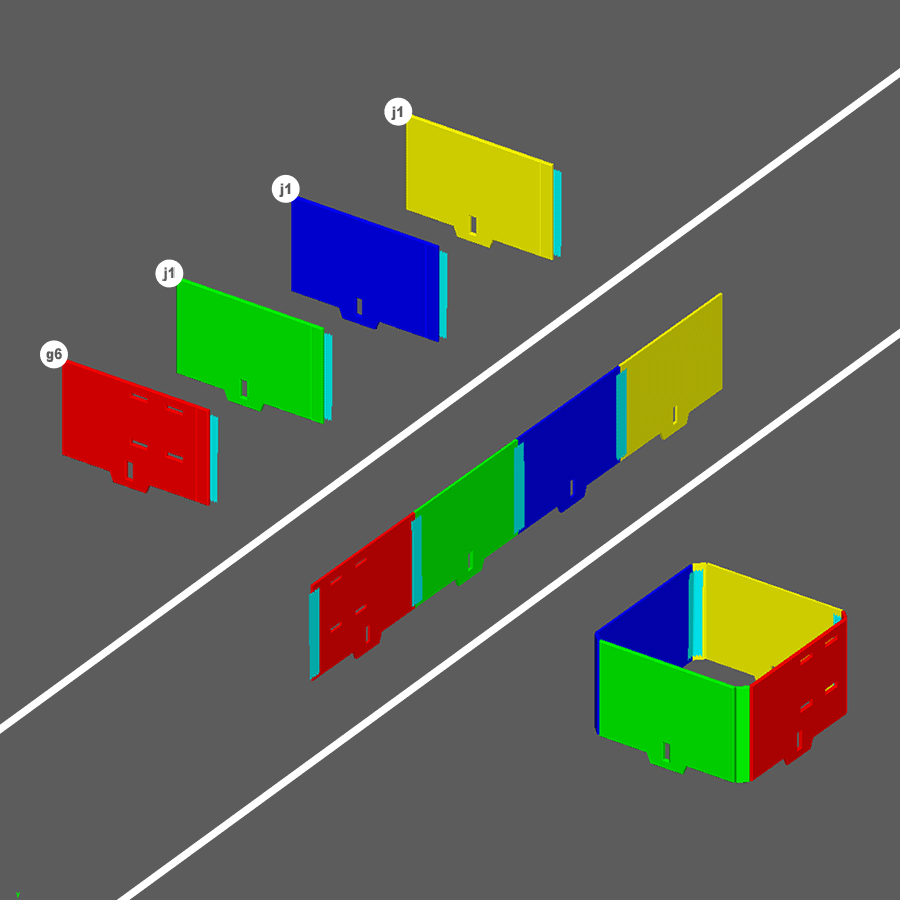
Step 8
- Put tape on backsides of pieces as shown with turquoise strips.
- Attach all 4 pieces together as shown.
- Tape the ends together to make the structure shown.
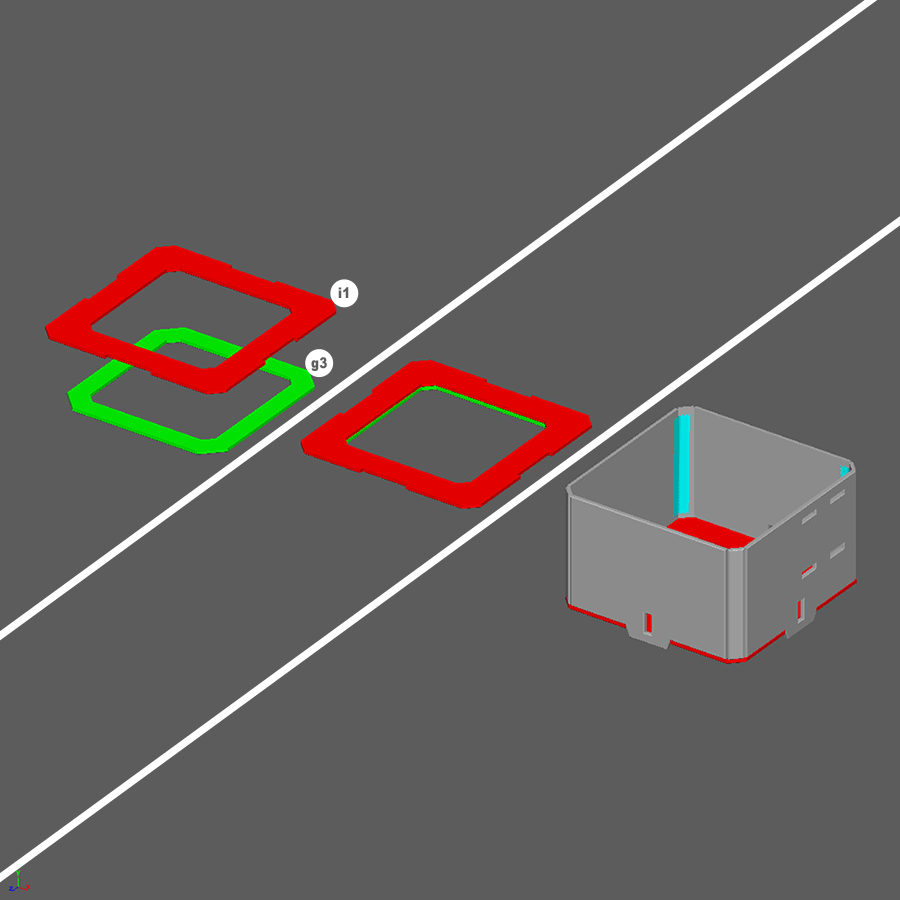
Step 9
- Glue and clamp pieces g3 and i1 together as shown, making sure inner edge aligns.
- Glue to bottom of structure as shown, making sure structures seats firmly on piece i1.
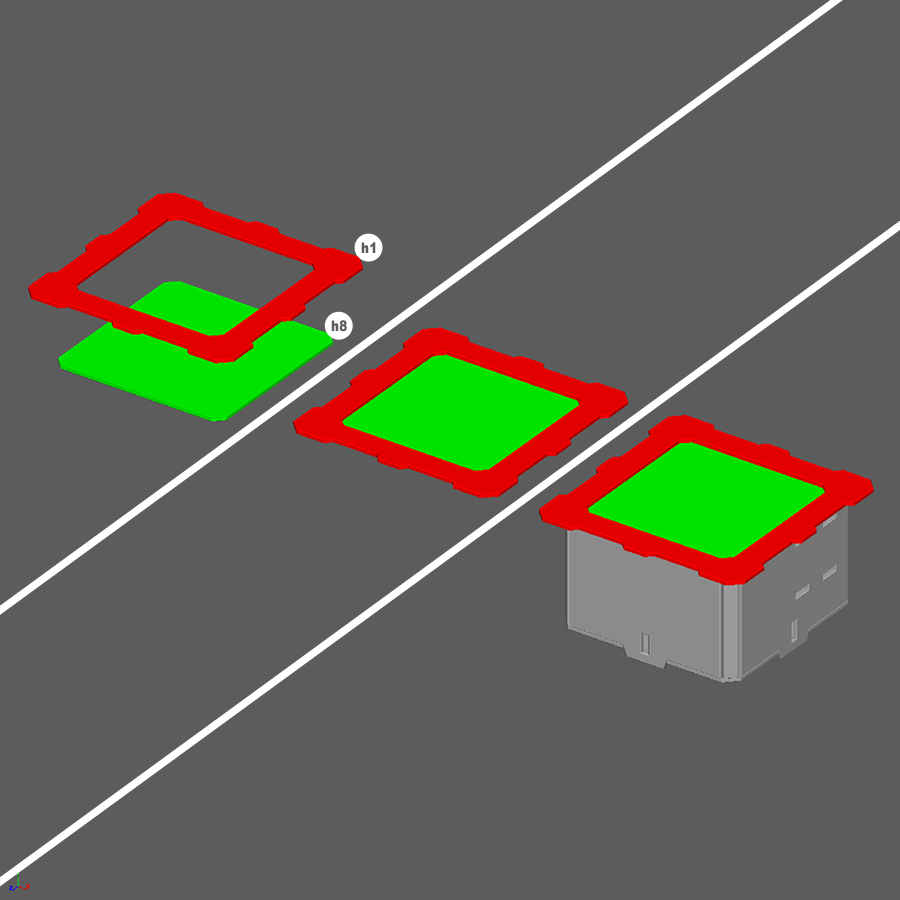
Step 10
- Glue and clamp pieces g3 and i1 together as shown, making h8 is centered on piece h1.
- Glue to top of structure as shown, making sure piece h8 seats down in structure.
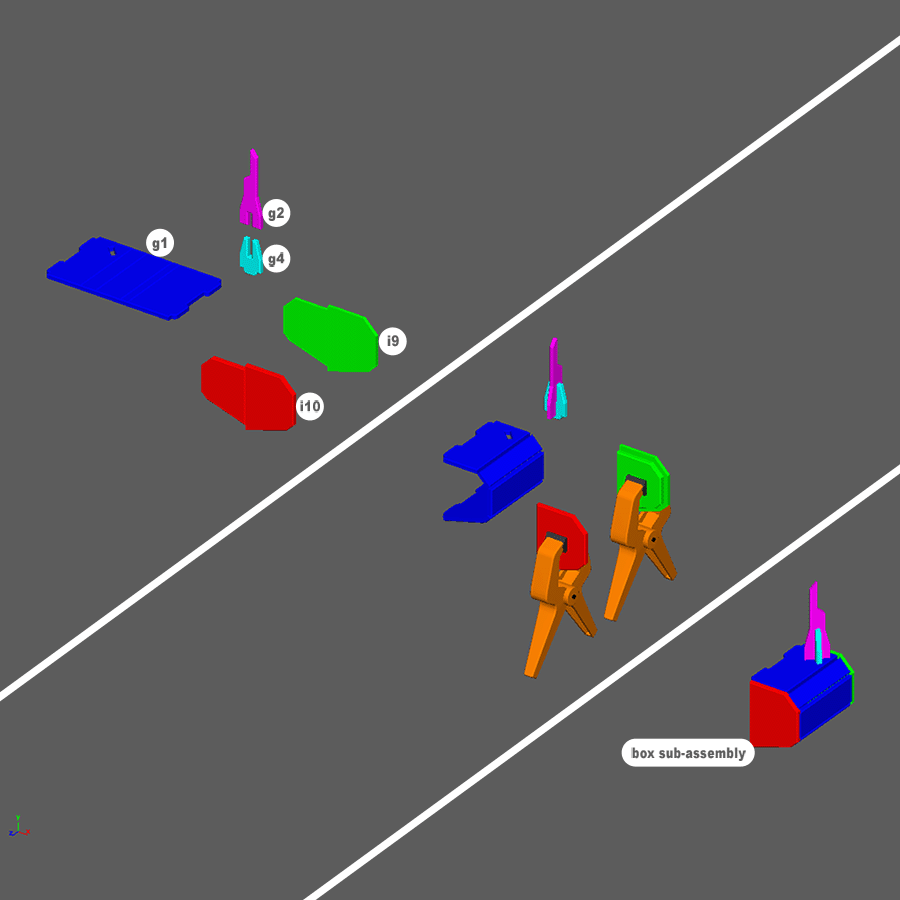
Step 11
- Fold piece g1 as shown.
- Fold, glue, and clamp pieces i9 and i10 as shown.
- Glue pieces g2 and g4 together as shown.
- Glue entire assembly together as shown.
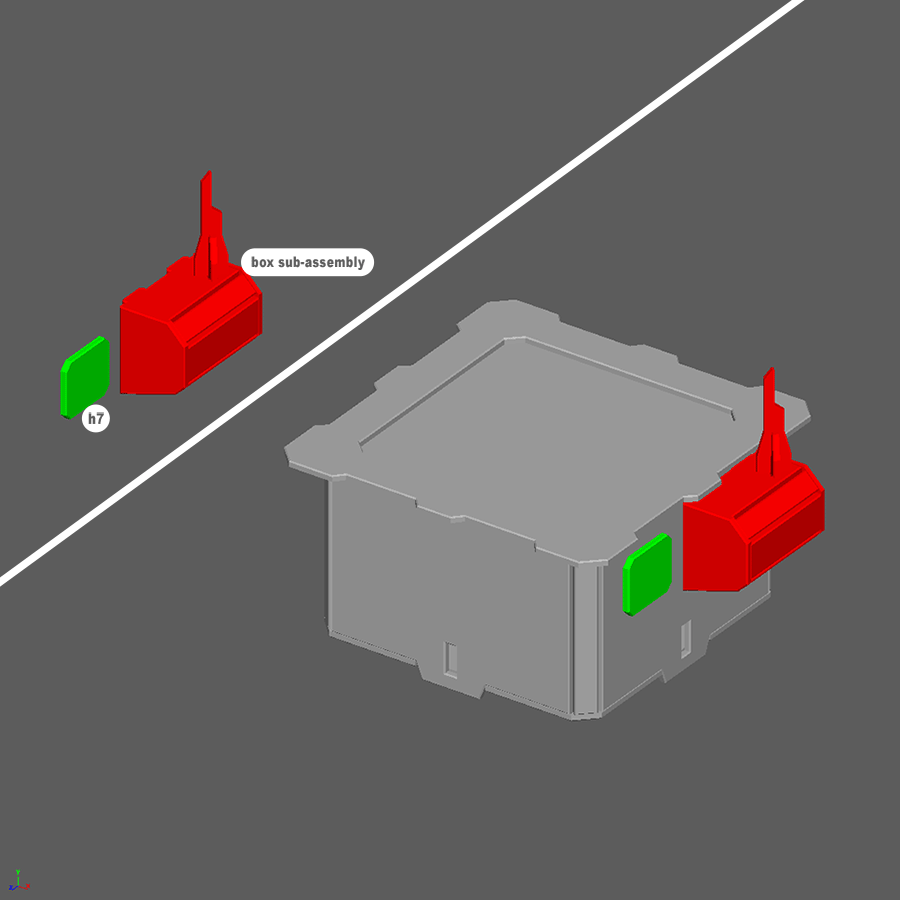
Step 12
- Glue piece h7 and assembly to structure as shown, ensuring the assembly fits into slots on wall.
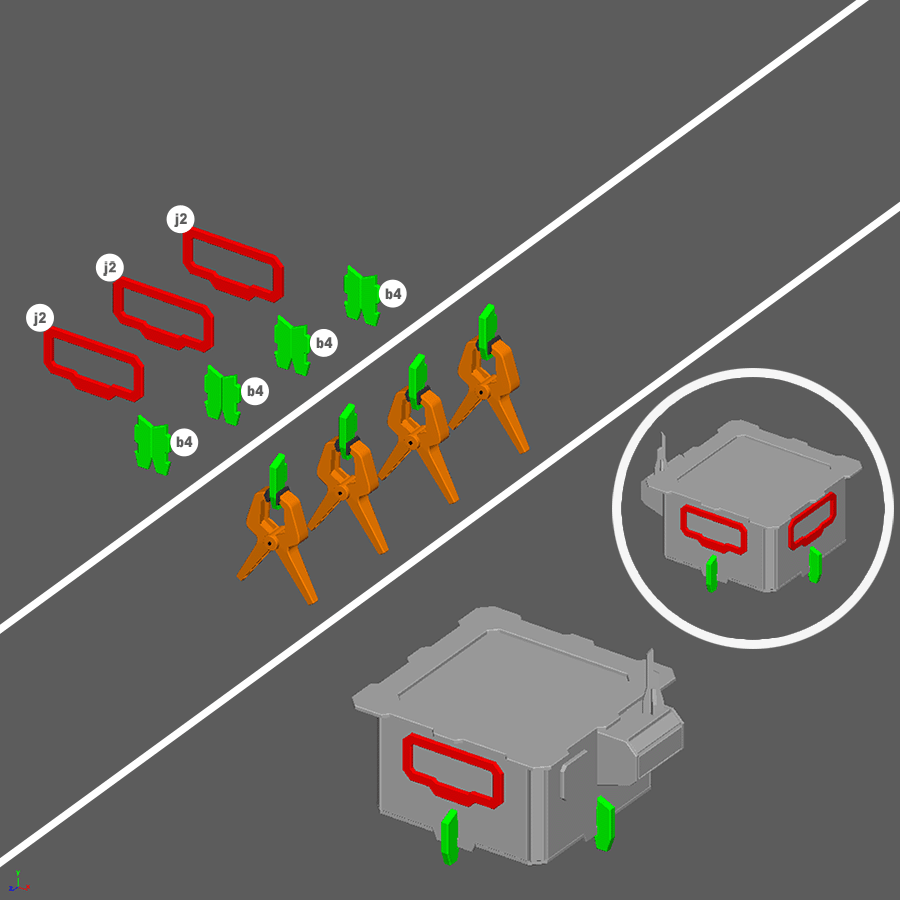
Step 13
- Fold, glue, and clamp pieces b4 as shown.
- Glue pieces b4 into slots in base of structure as shown.
- Glue pieces j2 to flat walls of structures as shown.
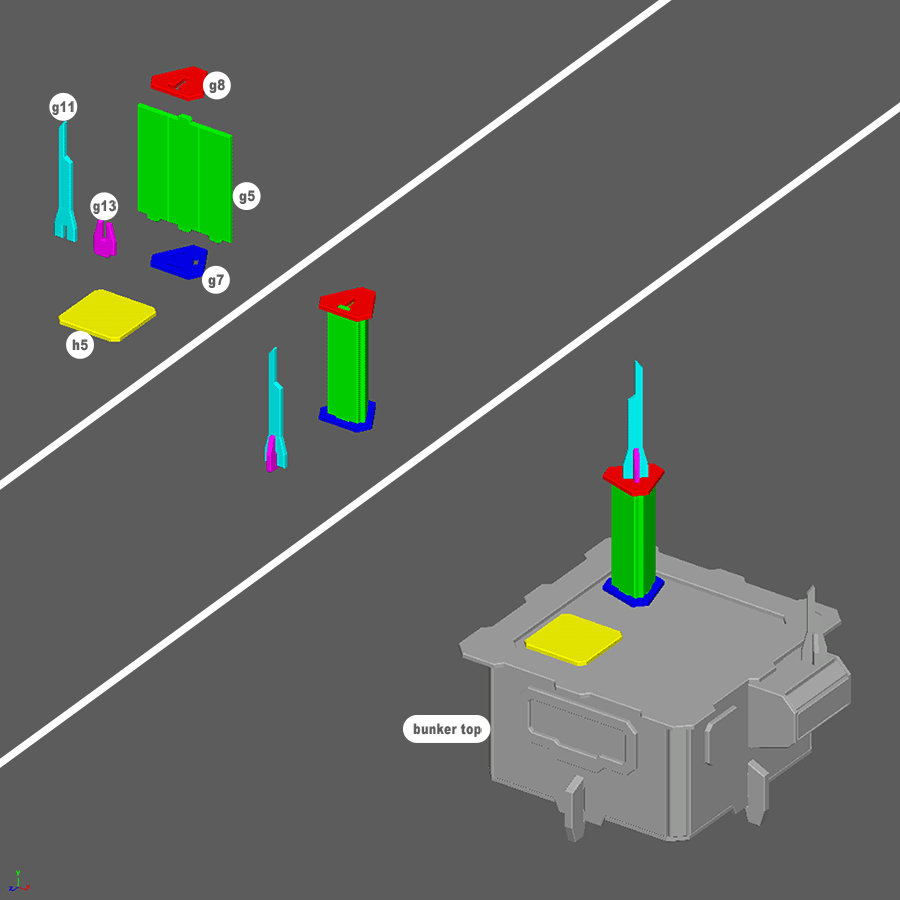
Step 14
- Fold piece g5, and glue into pieces g7 and g8 as shown.
- Glue piece g13 into g11 as shown.
- Glue pieces g13 and g11 onto top of previous piece as shown.
- Glue piece h5 onto roof as shown.
NOTE: The larger antenna structure does not need to be glued to roof for ease of storage.
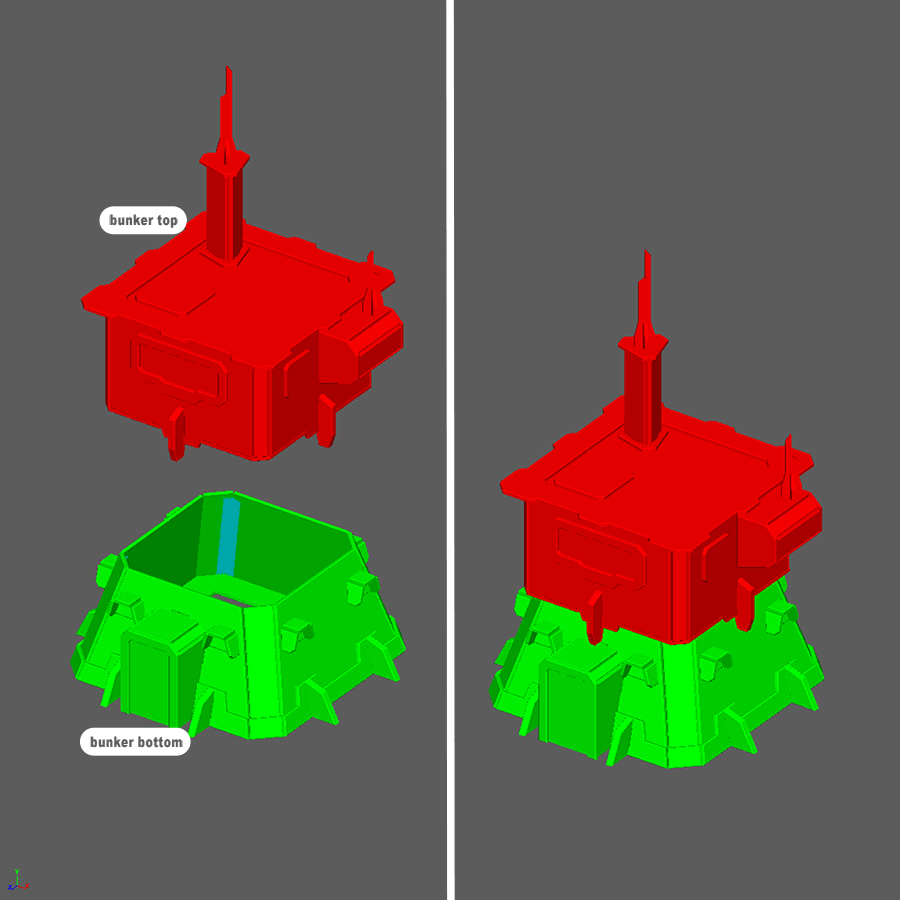
Step 15
- Glue top to bottom as shown.
NOTE: The bunker top and bottom can be left unglued if you need addition storage space.
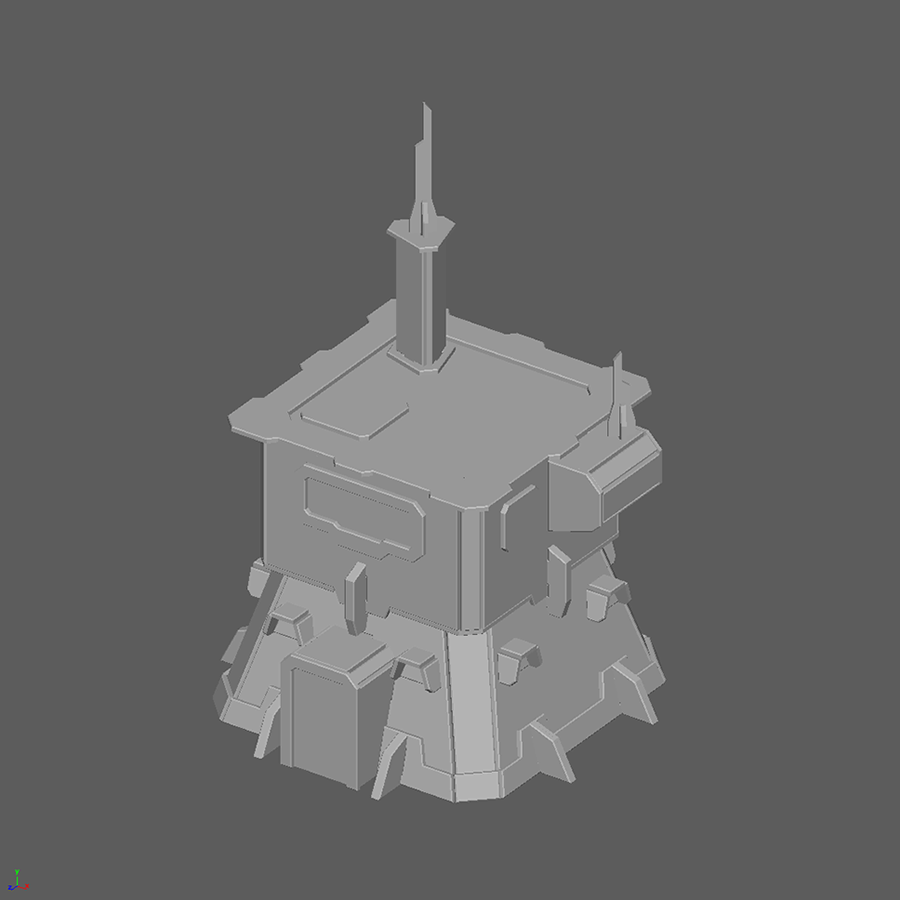
You’ve Finished The Comms Bunker
Time to move on to another set!